Today we'll complete the automation of our internal celebration process. In the previous blog, we explained how to invoke a bot from the MuleSoft Composer to discover the next upcoming birthday or work anniversary. It is time to create a robot responsible for ordering cupcakes from Lola's website to mark the special occasion.
 Preparation
First of all, let's define and agree on what we expect from our bot:
- The bot logs into Lola's cupcake website;
- The bot selects and adds a few cakes to the shopping basket;
- The bot checks out the order by filling in the form, including the delivery time and date;
- The bot writes a gift message;
- The bot proceeds to pay.
Note that the actual step of placing the order is out of this demonstration's scope.
Before starting the automation, I familiarised myself with Lola's website. I wanted to ensure that the bot could complete each step of interaction with the site. What if some message pops up on the screen during the process? It would jeopardise our plans to move forward with the automation. I realised that selecting a delivery date from the carousel would require more effort and thinking. I will explain it in detail later on.
I chose to use the Web Automation actions steps to build this automation. It captures the XPath of the fields the bot will interact with instead of relying solely on GUI. Any changes to the interface may interfere with the bot execution.
Main tasks and variables
The process automation includes two main tasks performed by the bot:
- Login into Lola's website, which handles the login step;
- Select cupcake and proceed to checkout, which does the rest of the order.
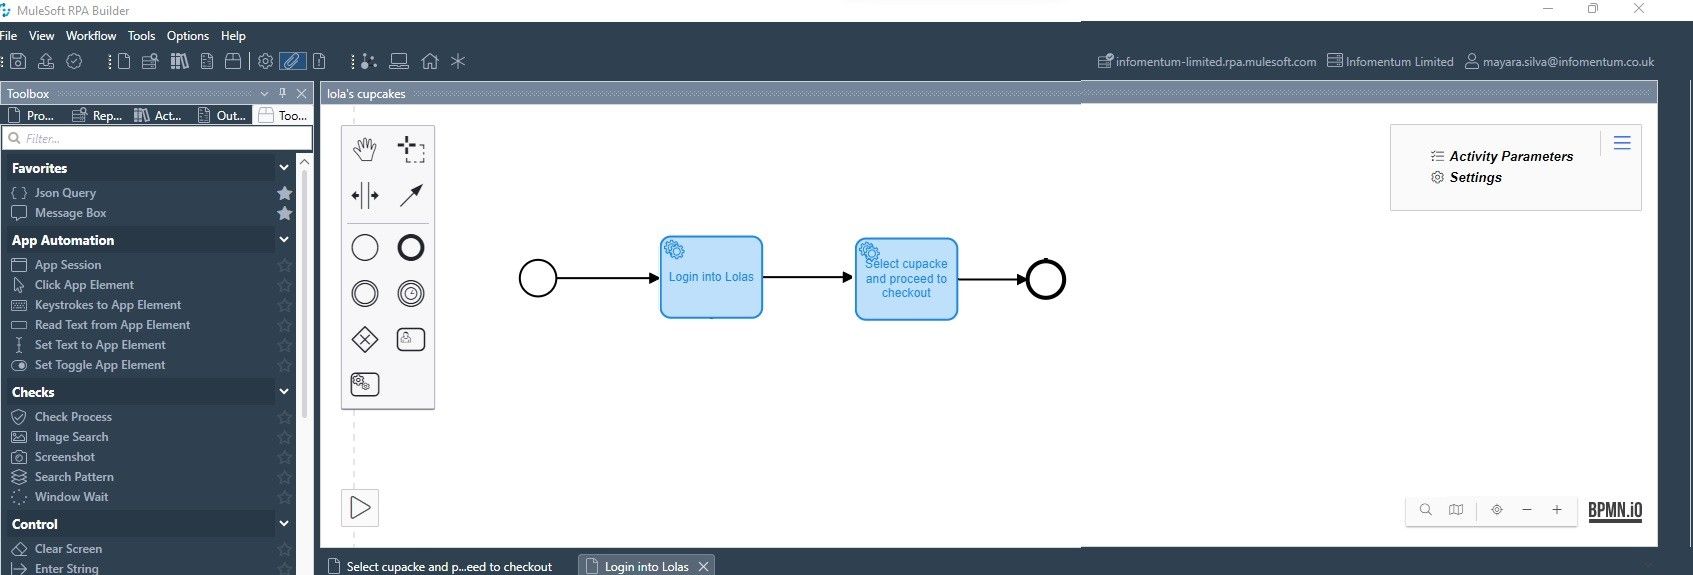
I start by setting the RPA login credentials and Web session ID variables.
1. Click on Activity Parameters in the top right corner of the BPMN:
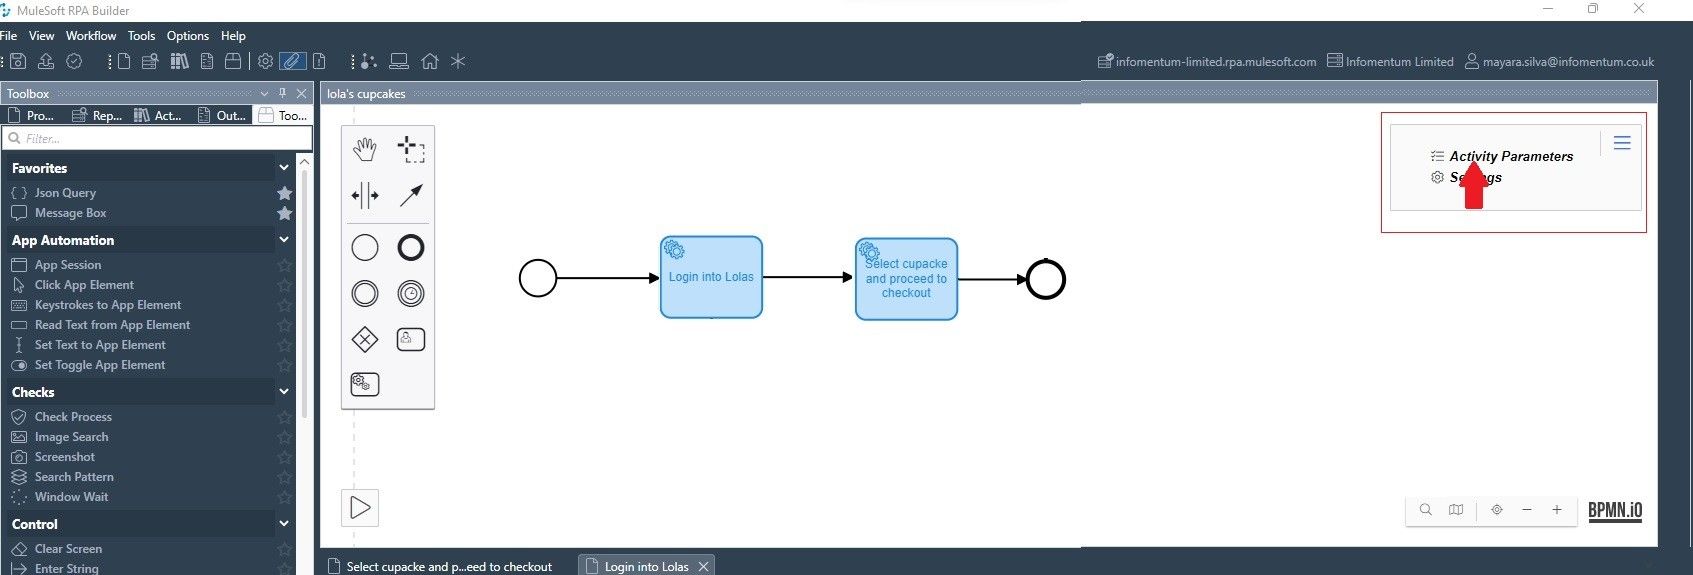
2. Click on Add new parameter
![]()
3. Select Add user account Variable option:
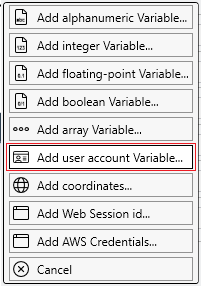
Below is how it should look like

4. Then, repeat steps 1 and 2 to select Add Web Session id variable:
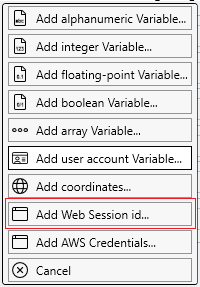
Once the variables are set, click OK.
Configure Login into Lola'' automation task
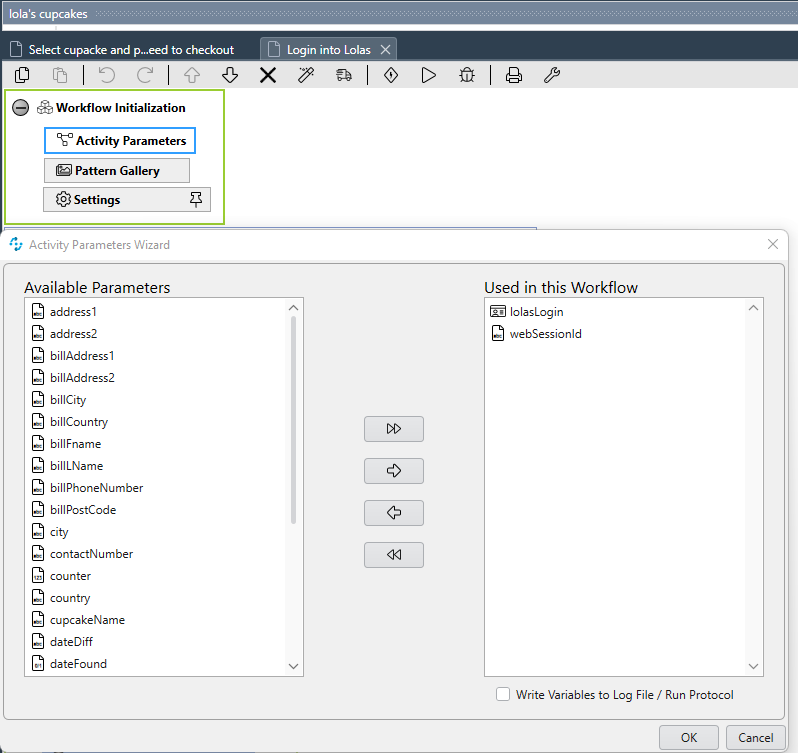
Double-click on the task "Login into Lolas" to move to the task. In the workflow initialisation, double-click Activity Parameters and click on the right arrow to bring our new variables into this workflow.
Next, in the Activity Workflow, select action steps from the toolbox under Web Automation, such as Web Session, Click Web Element and Keystrokes to Web Element, and User Account Decrypter action step under variable handler.
This is how my Activity Workflow and the breakdown of each action step should look like:
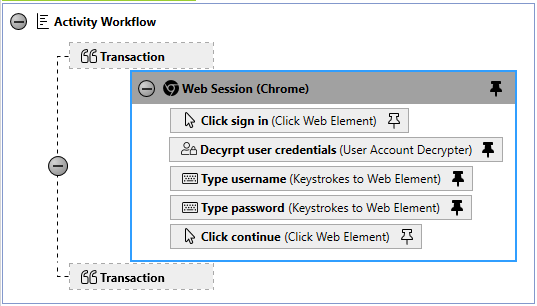
The Web Session id is used to open Lola's website and hold the session to the following bot task.
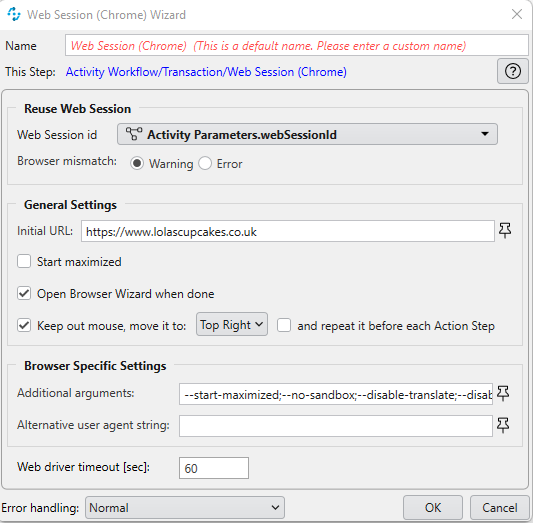
Web session action steps
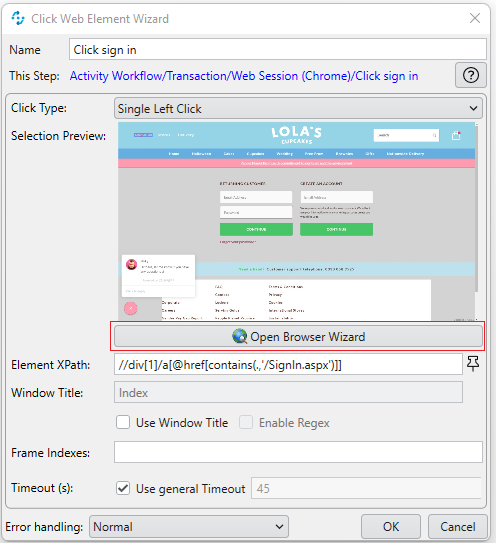
Sign in to the website Web Element
In this action step, the bot should click Sign In link in the top left of Lola's website.
To enable this action, click "Open Browser Wizard", hover over the mouse to "sign in", and press F2 on the keyboard. Click on ![]() mark in the right corner of the screen to accept the selection.
mark in the right corner of the screen to accept the selection.

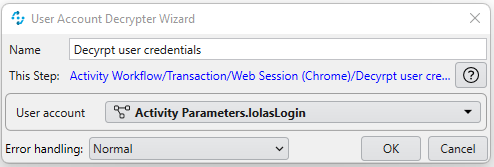
User Account Decrypter
Decrypt the credentials from the variable User Account created previously.
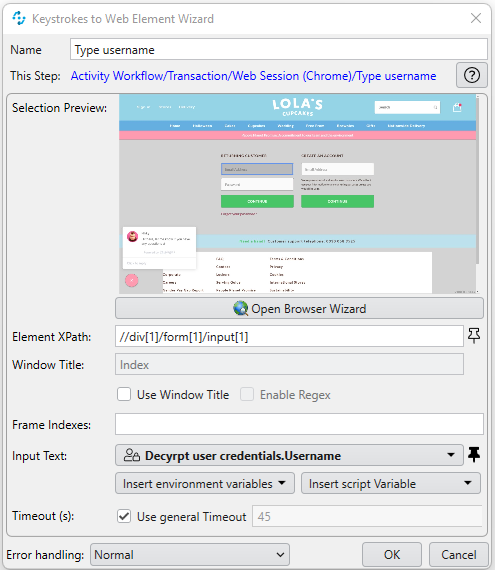
Keystrokes to Web Element - username
Click the text field email address and type the username. This step is similar to the Click Web element described above.
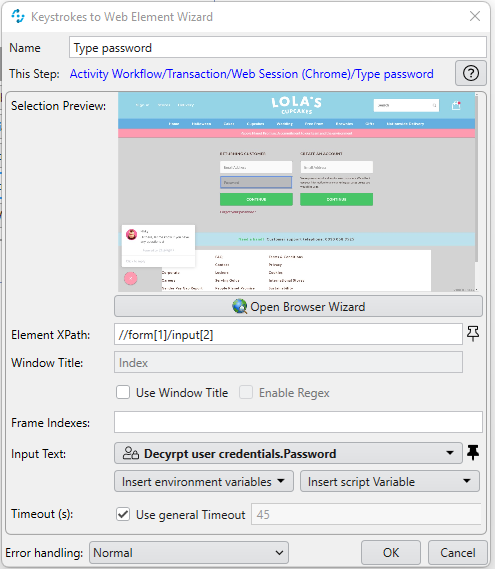
Keystrokes to Web Element - password.
The bot clicks 'Continue', finishing all action steps inside Login into Lola's task.
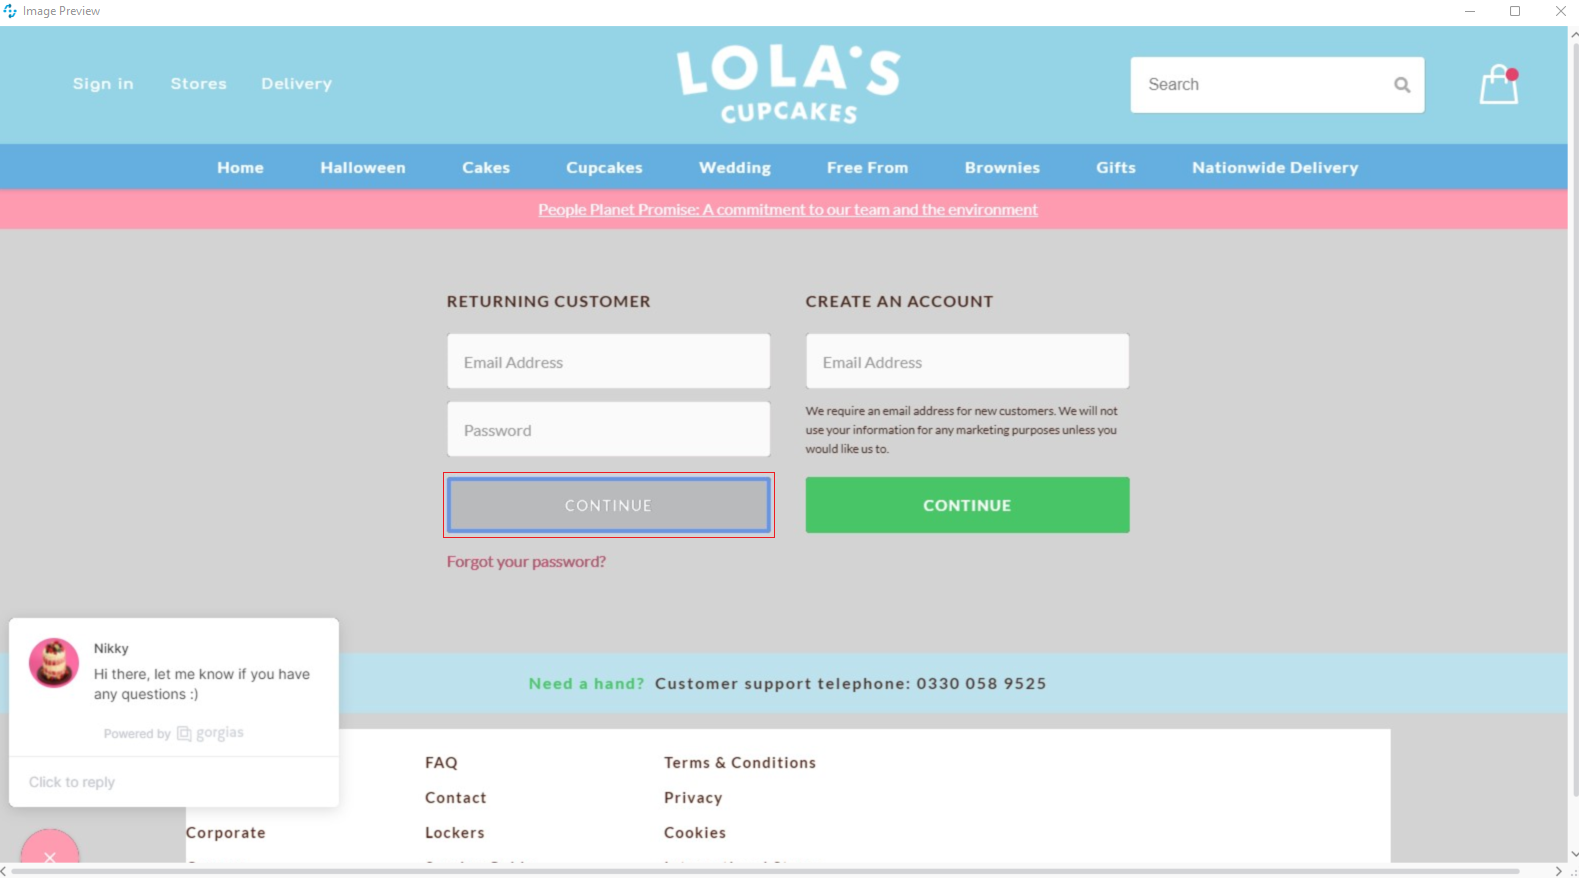
Now, the bot moves to the next task to select cupcakes and checkout the order.
Select cupcake and checkout automation task
All key action steps of the task are demonstated in the video that I have recorded for you.
The remaining variables have already been set up, and all interactions with the website are wrapped inside the web session, as shown below:
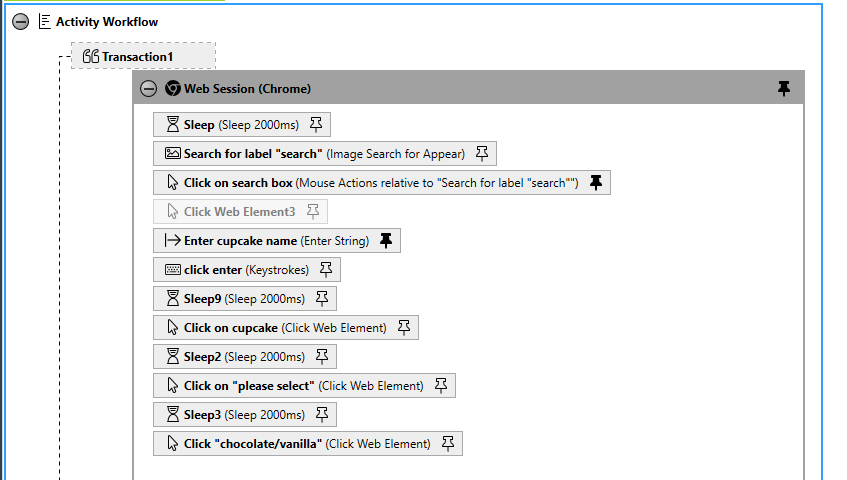
Search and select cupcakes
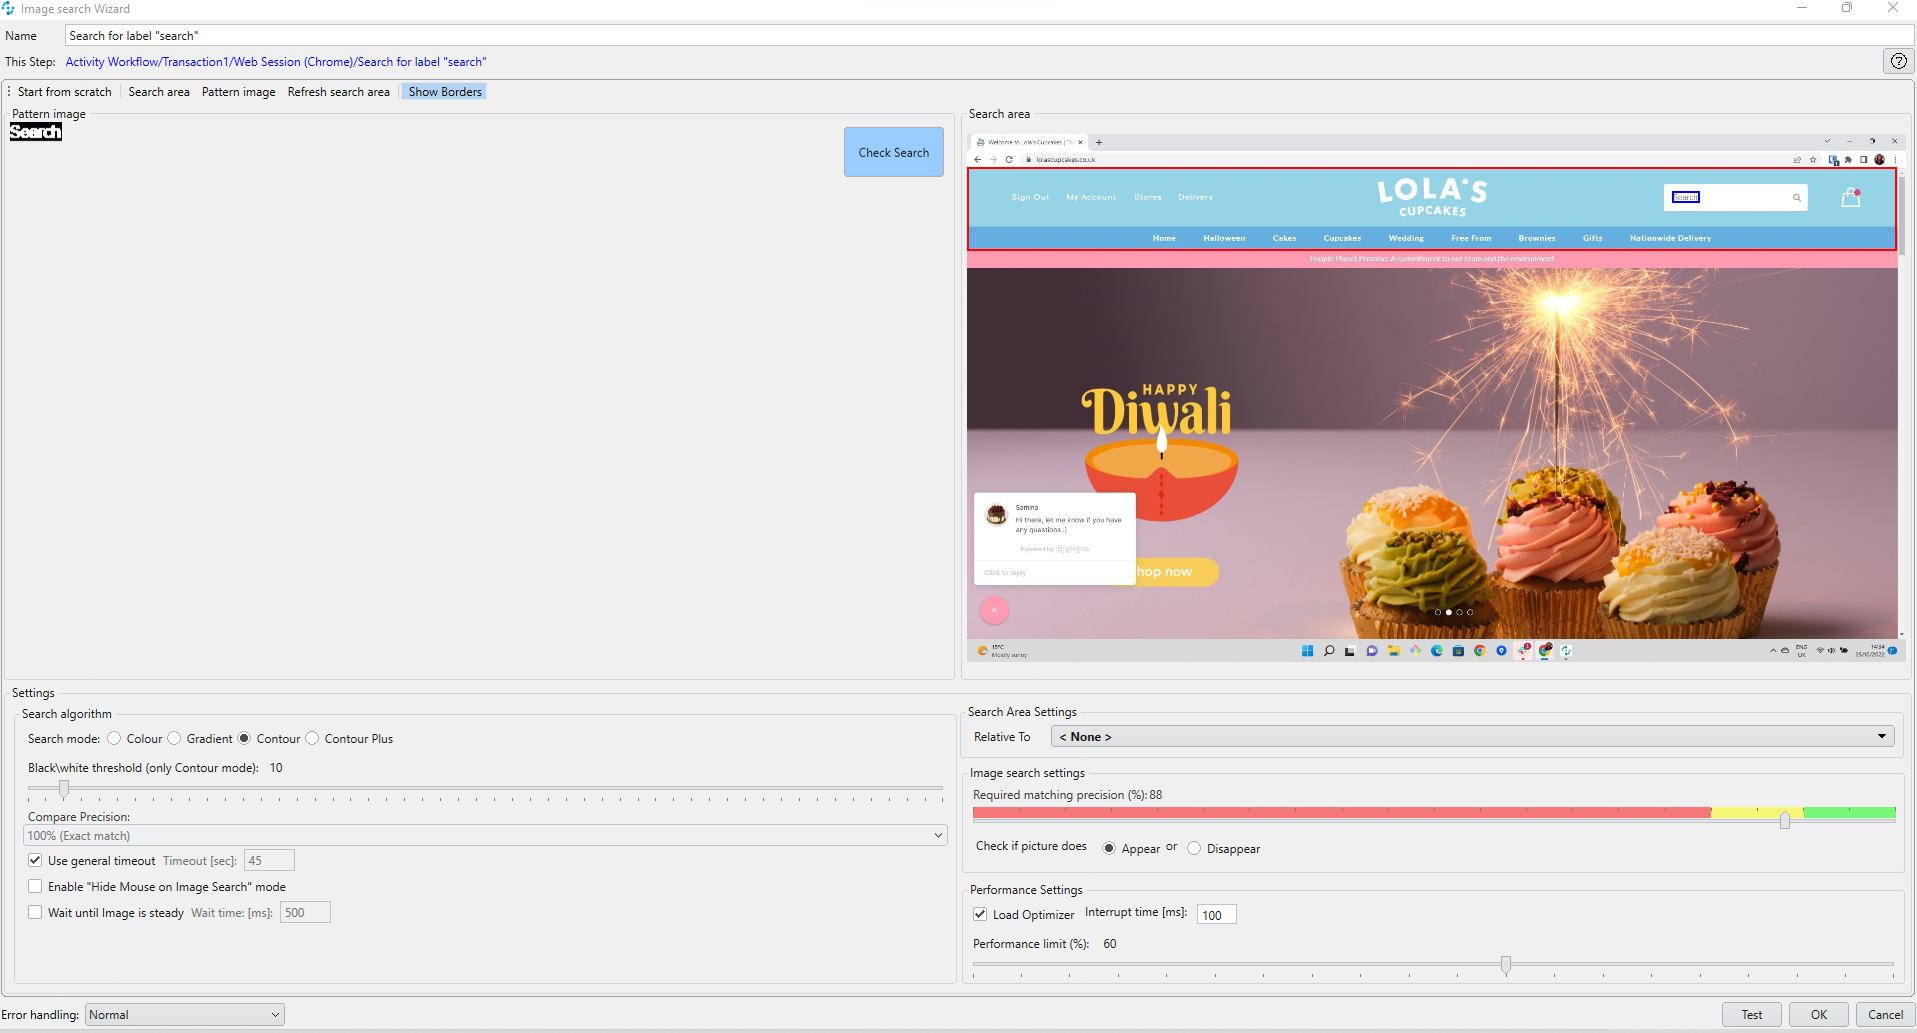
The cupcakeName variable holds the value of the cupcake we want to buy. From the toolbox, I drag and drop the Image Search option. Use this action step to locate the input field "search", where the bot types the cupcake value.

Cupcakes delivery
After selecting the cupcakes, click "continue to checkout". The bot moves to the Delivery/Collection section on Lola's website.
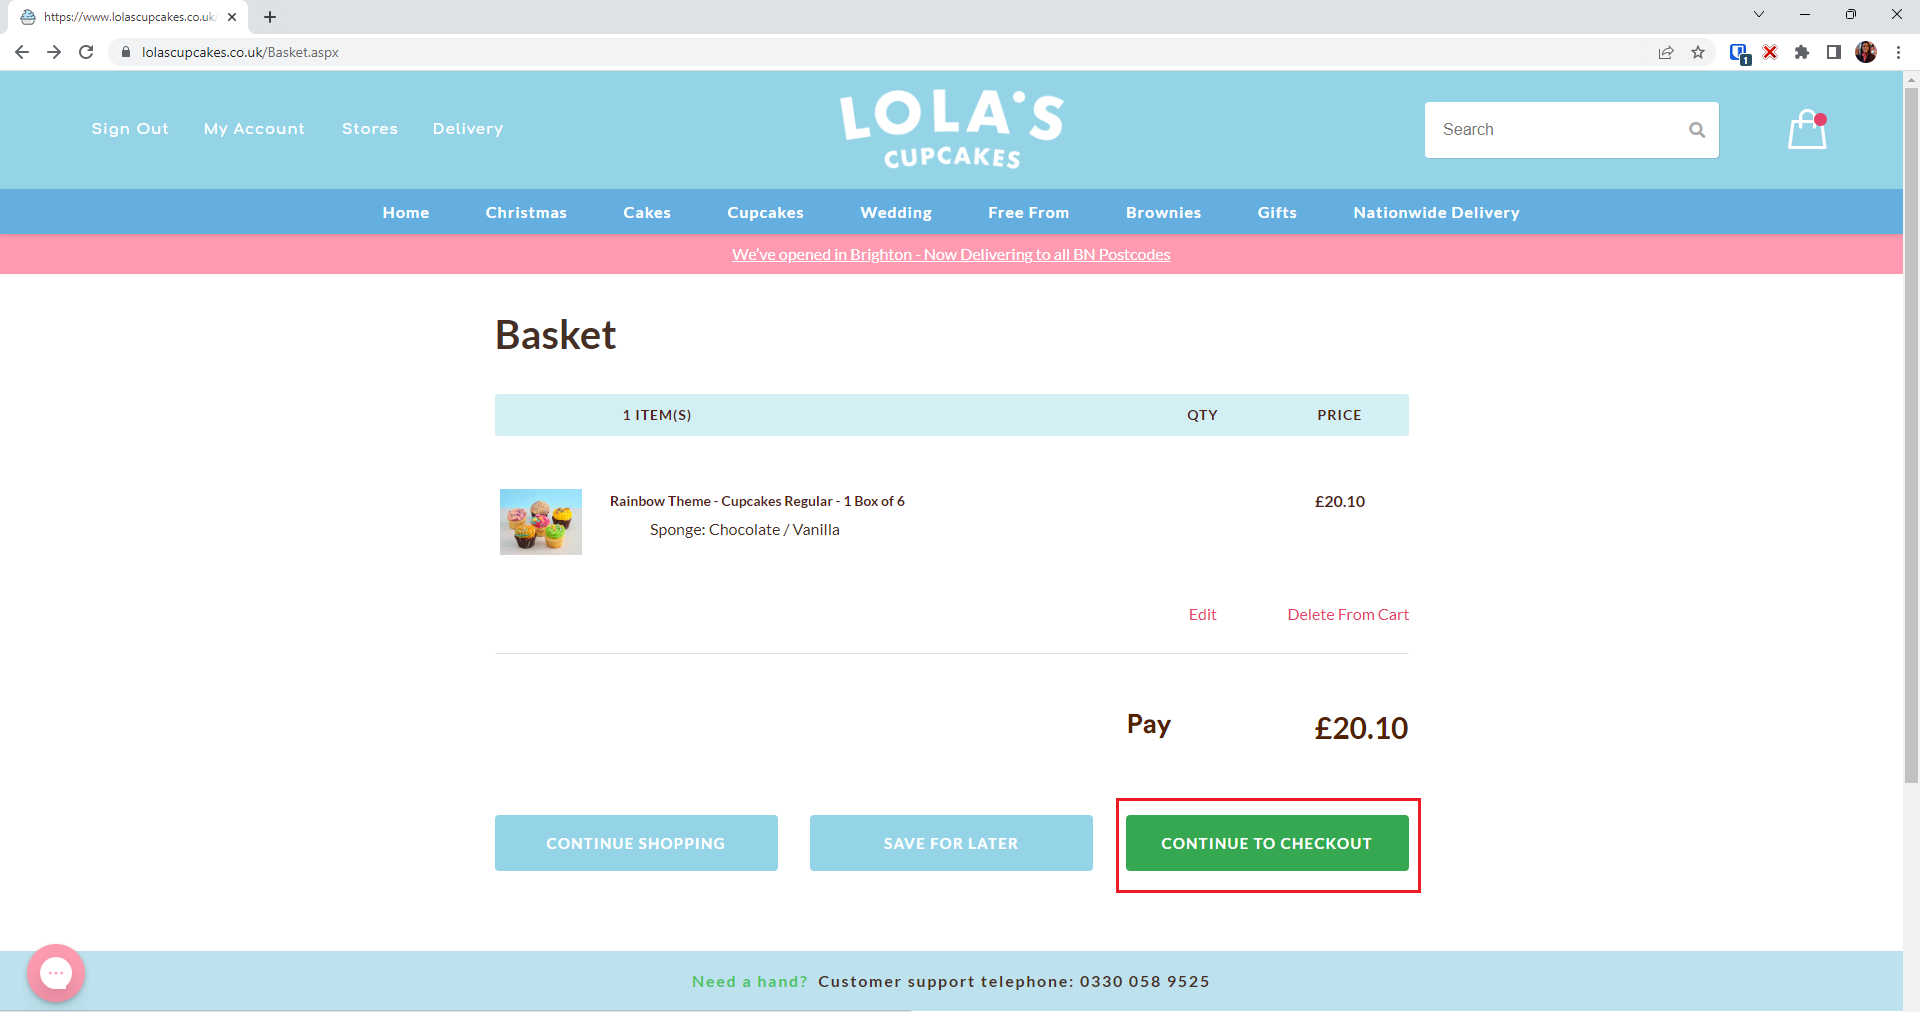
The Delivery/Collection step requires the bot to submit the employee's data, like his full name and contact number. The required information has already been retrieved from MuleSoft Composer and stored in the variables ready for use. The bot uses a combination of action steps from Web Automation, as shown earlier in this post, and from other components available in the toolbox.
Select the delivery date
Now, let's jump into how the bot selects the delivery date from the carousel below.
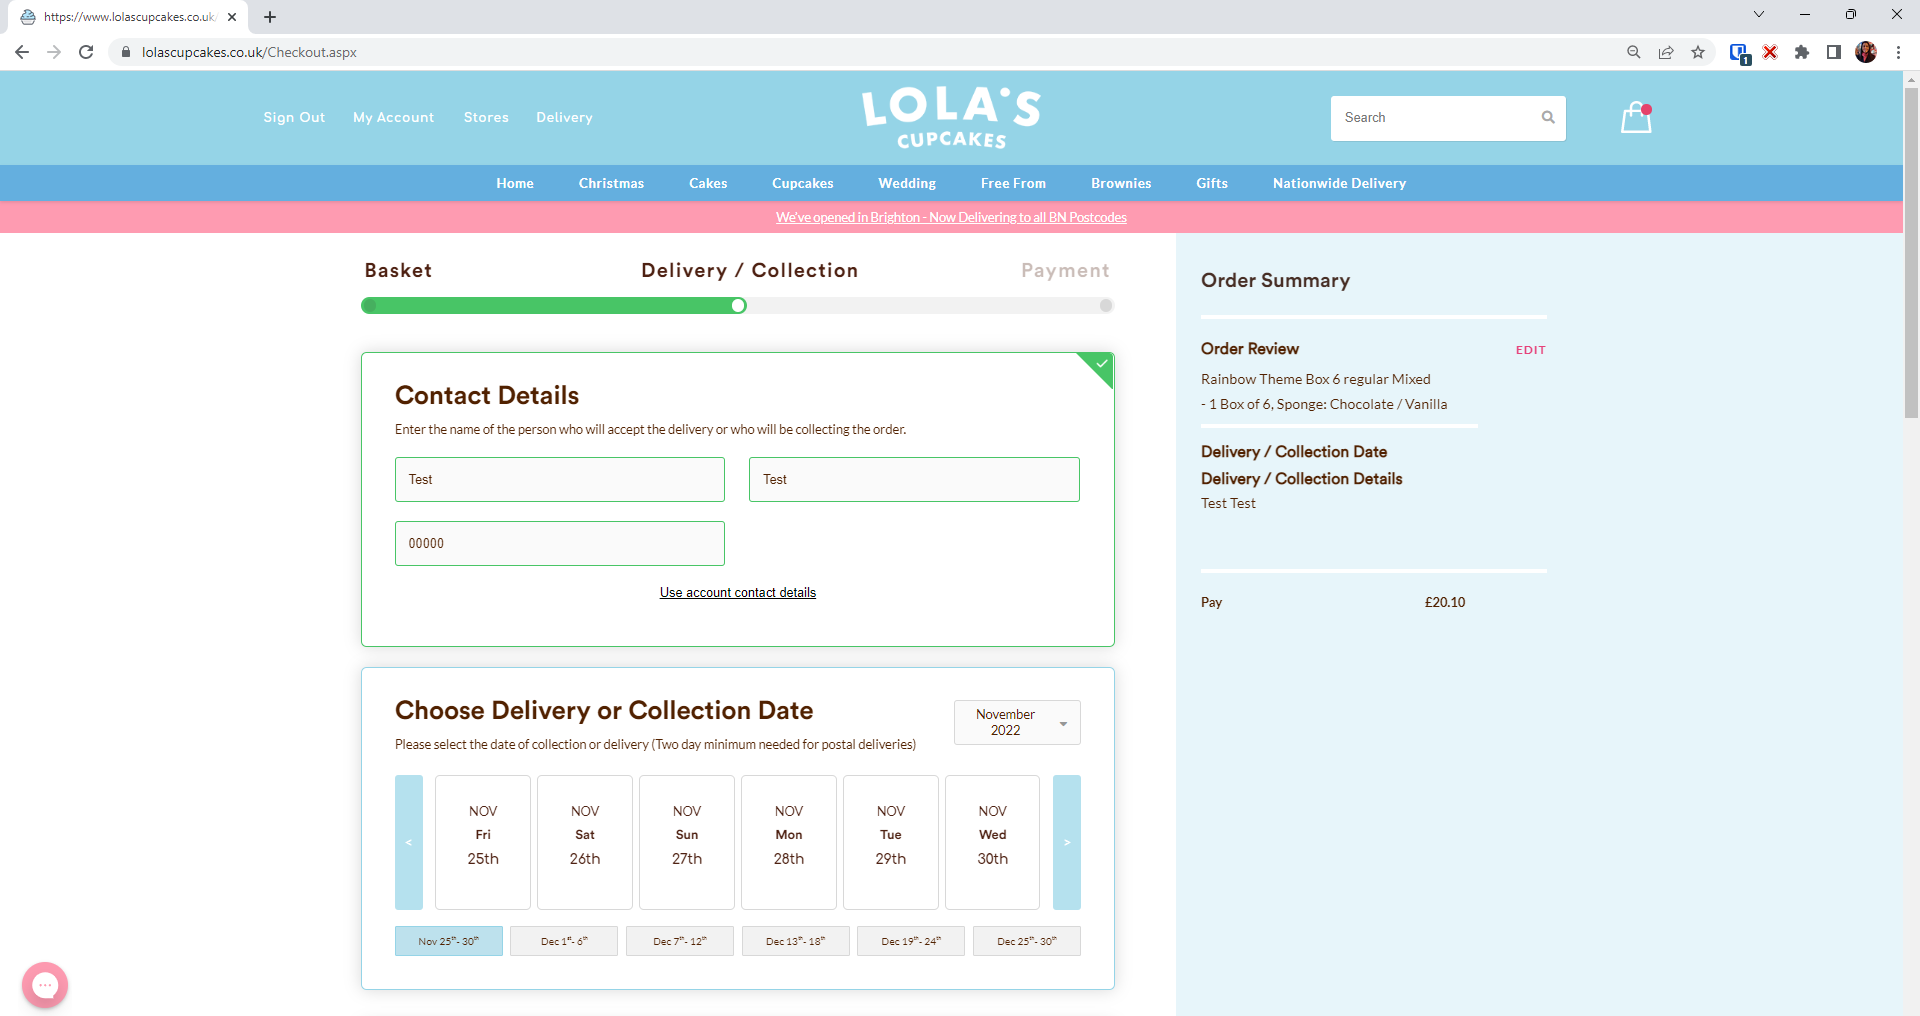
The delivery date can occur either within the current week or next week. For example, the date carousel displayed in the image above starts with the current date + 1, though in the afternoon, it changes to the current date + 2. To illustrate this, let's assume today is the 24th of November. The date carousel would start with the 25th of November and then add 2 more days, changing the starting date to the 26th of November.
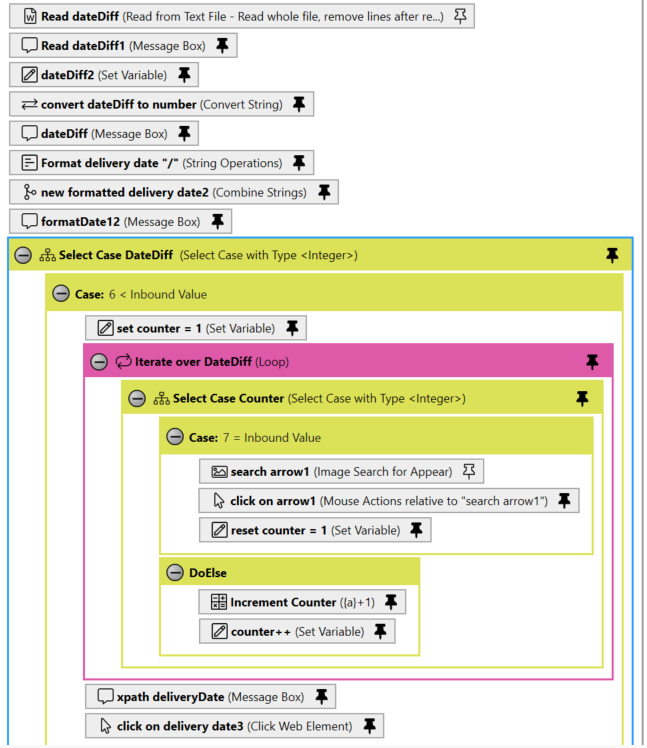
Once the bot identifies the carousel starting date, it can calculate the difference between the order delivery date and starting date. If the result exceeds 6 days, the bot knows the delivery date will not occur within the same week, and it should look for the date in the following week.
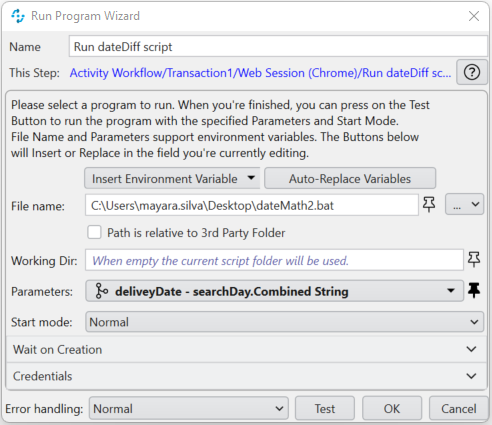
The difference between dates is calculated by a bat script found in Date Math. The script has been slightly adjusted for this automation.
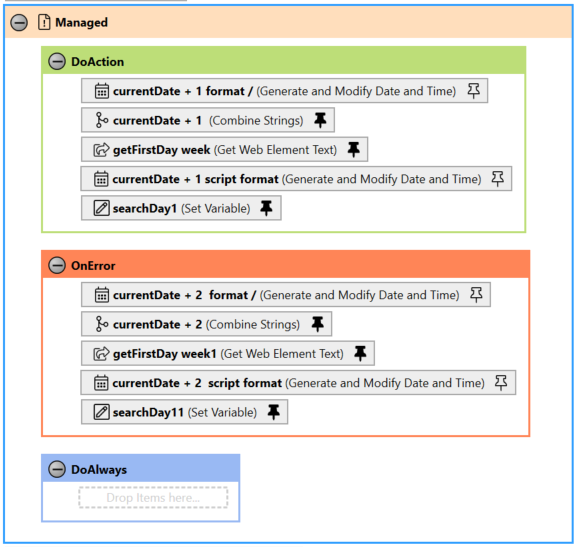
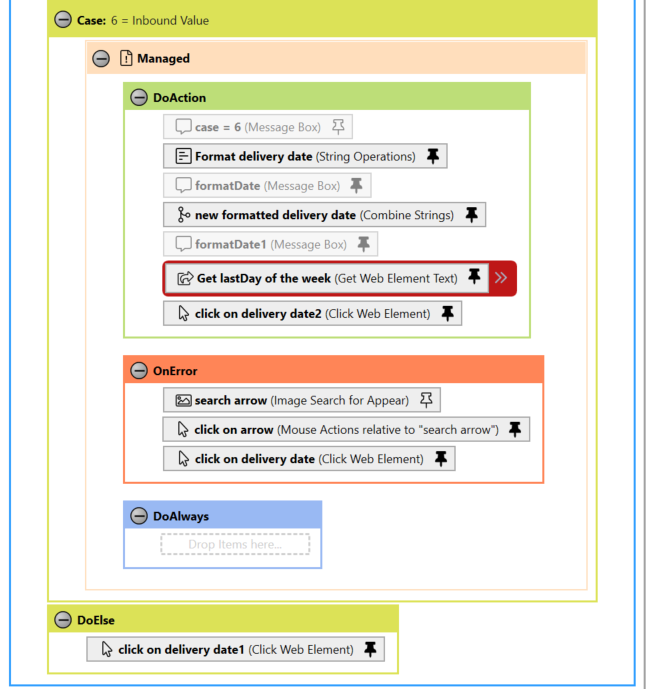
Here are screenshots demonstrating how the steps were set to achieve what I described above. A Managed action step (same as Try/Catch) contains the instructions to define the starting date of the carousel and format it accordingly to be later used in the bat script.
The fragment below shows that the Combine String action step combines deliveryDate and searchDay, which are used by the Run Program action step that executes the bat script.

The script saves the result in a .txt file, later consumed by the Read from text file action step. After that, the bot converts the result from String type to Number type to evaluate and iterate over that value.
Once the steps above are completed, the bot selects a delivery time slot, writes a gift message, and proceeds to payment.
Process automation video
Now comes the fun part!!! This video demonstrates the end-to-end automation of ordering cupcakes from MuleSoft Composer to RPA.
Summary
In this blog, we demonstrated how to create and execute bots using MuleSoft Composer and MuleSoft RPA. We've completely automated repetitive manual tasks to save our Operations team's time and effort.
If you want to know more about MuleSoft Automation capabilities, check out our previous blogs, where we explore this technology in detail:
- MuleSoft RPA in action;
- Easy steps to automate a process with MuleSoft RPA;
- Intelligent Document Processing with AWS AI Services and MuleSoft RPA;
- Birthday wishes from MuleSoft Composer;
- Publish MuleSoft RPA into Exchange and invoke it from a Mule API.
We've also included some helpful resources from the MuleSoft Documentation. Happy reading!


.png)
.png)

