
It’s been a while since my last write up on MuleSoft Anypoint Code Builder. While several new features have been introduced this year, I want to focus on MuleSoft’s artificial intelligence (AI) integrations. Let’s be honest, AI has been a hot topic for a while and isn’t going away anytime soon. So in this blog, I’ll guide you through using the Agentforce Generative Flow feature in Anypoint Code Builder and also share some practical tips along the way to help you get the most out of it.
But first, let’s run through a quick summary of Anypoint Code Builder and Agentforce before we get into the more technical elements of how they work.
A quick refresher on Anypoint Code Builder
Anypoint Code Builder is an integrated development environment (also commonly referred to as IDE) accessible via both web and desktop. You may wonder how Anypoint Code Builder differs from the good old Anypoint Studio. The key distinction is that Anypoint Code Builder is based on Visual Studio Code, whereas Anypoint Studio is based on Eclipse.
But that’s not all. Anypoint Code Builder is suitable not only for implementing APIs but also for designing and developing them. You can design your API using RAML or OAS 3 specifications and then test it using a mocking server.
What is Agentforce?
Salesforce’s beloved AI sidekick has had an upgrade, and it goes by the name Agentforce. In simple terms, Agentforce is the next-generation AI platform within the Salesforce ecosystem that enables users to create intelligent, autonomous agents. These AI agents are autonomous applications built to perform specialised tasks. Under the hood, they use Large Language Models (LLMs) to analyse and understand customer interactions or automated triggers, and they are designed to take actions autonomously within guidelines and rules set by humans.
But behind Agentforce is a familiar face: Salesforce Einstein. Einstein is the AI engine that’s been quietly powering predictive insights, intelligent automation, and smarter workflows across Salesforce products for years. It provides the brains, while Agentforce brings those capabilities to life, turning Einstein’s intelligence into autonomous action.
Together, Einstein and Agentforce form a powerful partnership that empowers teams to scale customer service, reduce manual effort, and deliver faster, more personalised experiences.
Now that we’ve got the basics out of the way, let’s dive into how Agentforce is set up and how your team can get the most out of it.
One of Agentforce's many benefits is that it integrates seamlessly as an intelligent layer within the Salesforce ecosystem, streamlining processes and creating better experiences for both users and customers.
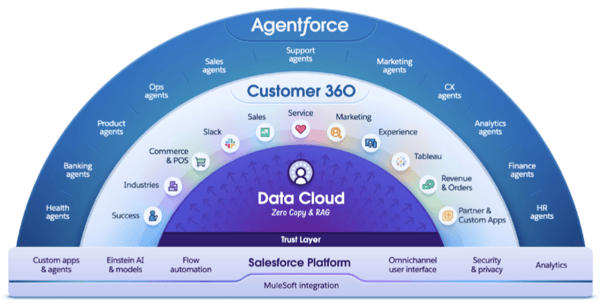
Reference: Image sourced from Salesforce
The Agentforce Generative Flow feature in Anypoint Code Builder allows users to type their desired prompt using natural language, similar to ChatGPT, and send it to Agentforce. Based on the prompt, Agentforce generates the corresponding code for the use case.
Users are shown a preview of the generated code to review and validate before inserting it into their project, along with a step-by-step description of what the code is designed to do.
Using Agentforce in Anypoint Code Builder
Enable Agentforce
To get started, you first need to enable the feature “Enhance Anypoint Platform with Einstein” in Access Management on the Anypoint Platform. Go to: Anypoint Platform > Access Management > Salesforce.
At the bottom of the page, click on ‘Accept’ to allow Einstein to be used, as shown in the picture below.
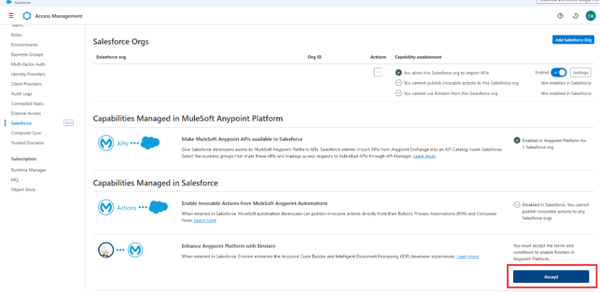
Enhance Anypoint Platform with Einstein.
I use Anypoint Code Builder in VS Code, and you can see the Agentforce icon in the top-right corner.
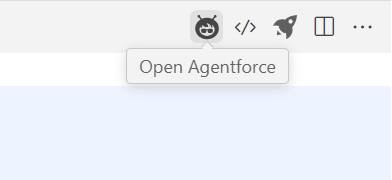
Agentforce icon.
You can also click on ‘Use Agentforce’ on the main page when opening your project in Anypoint Code Builder, making it easy to access it right from the start.
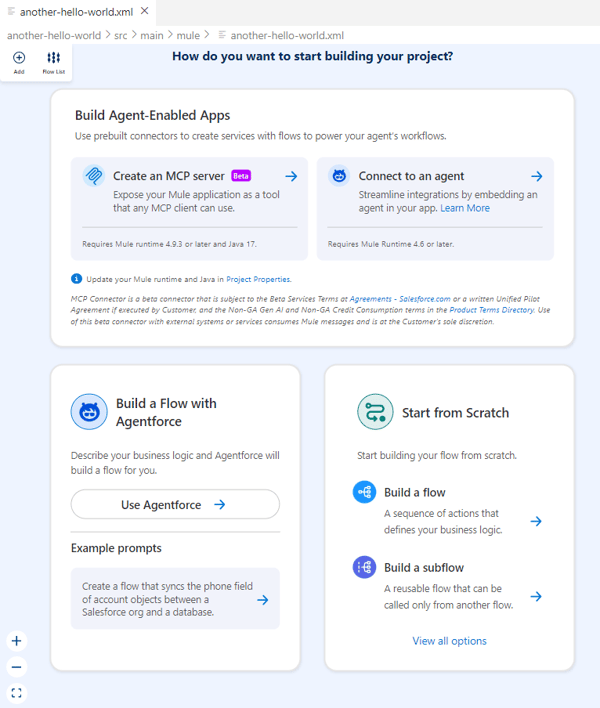
Access Agentforce when opening a project.
Building a flow in Agentforce
Let’s see Agentforce in action. Select “Build a Flow with Agentforce” to see the chat window.
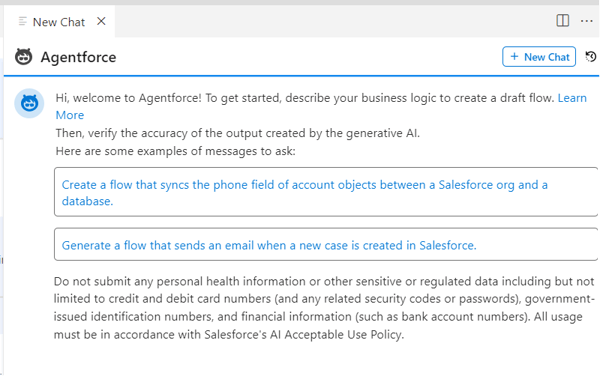
Agentforce pop-up chat window.
To test Agentforce, we use the same ‘Hello World’ project we used in my previous Anypoint Code Builder blog. Let’s ask Agentforce to create a simple flow with a payload set to ‘Hello World’.
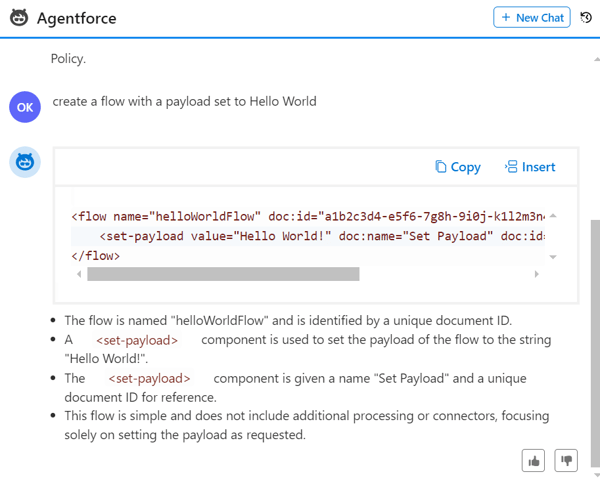
Asking Agentforce to create a flow.
We can see that Agentforce replied with code that does exactly what we wanted, along with a helpful description. But let’s make a small change and add a logger to log the payload after the Set Payload component. Below is the prompt I sent to Agentforce and the reply I received:
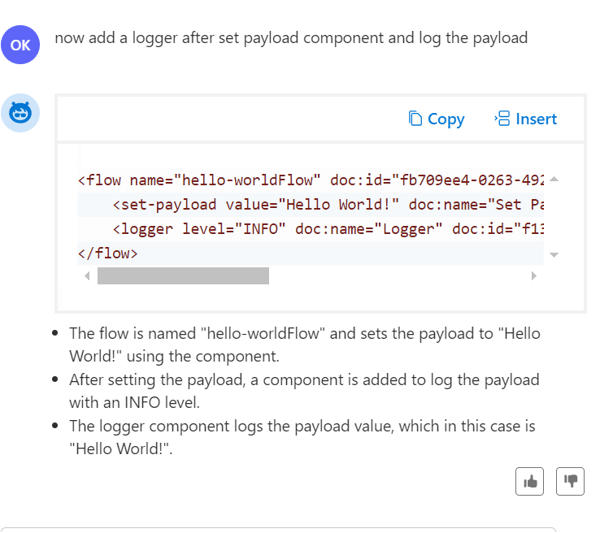
Changing the original Agentforce prompt.
When I clicked 'Insert' (highlighted in red), the code was automatically added to the implementation file, which you can see below.
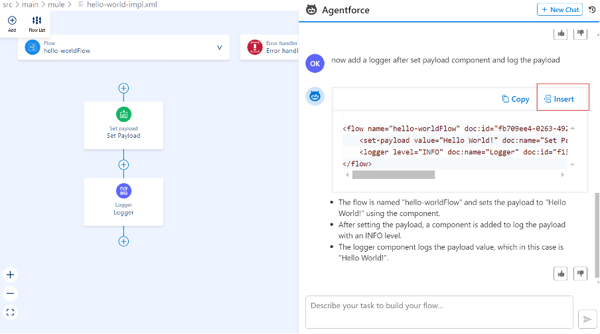
Code automatically updated.
Now, let’s try something a bit more advanced. Let’s ask Agentforce to create an HTTP listener with the host set to 0.0.0.0, port 8081, and a path named hello.

Creating an HTTP listener.
It created a flow with a listener and added the path as requested; however, it failed to create the necessary configurations. After inserting it into our flow, we noticed the configuration was missing and had to add it manually.
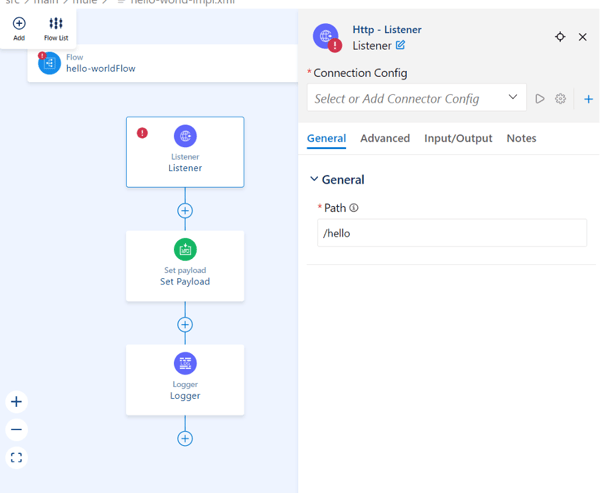
Example of adding the configuration manually.
Now, let’s take it a step further. Let’s ask Agentforce to create an MUnit test case for the flow it just generated:
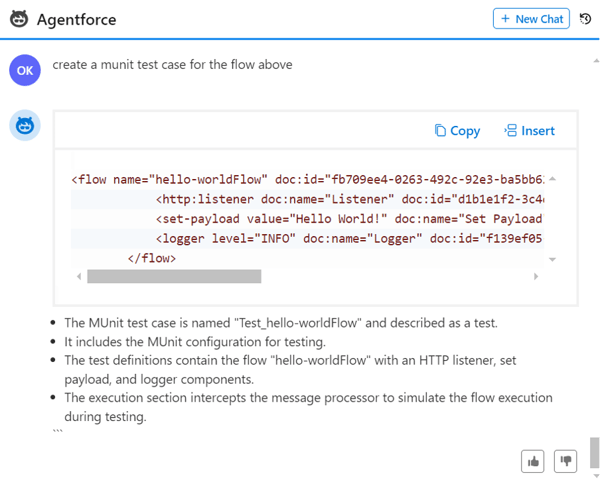
Agentforce creates a MUnit test.
This time, it didn’t go that well. Although the description says the unit test was created, it actually wasn’t - the code is just a repetition of what was done previously. We still need to create MUnit tests manually.
Another important feature is that you can check your chat history by clicking the icon highlighted in red. Chats are stored for up to 30 days.
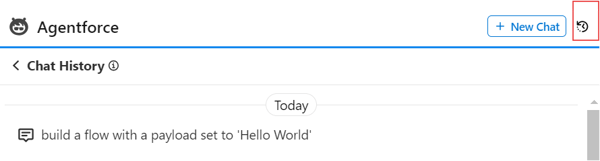
Chat history.
Top tips using Agentforce effectively
Agentforce is user-friendly for new developers thanks to its low-code tools and guided setup, while also offering advanced capabilities that experienced developers can fully leverage through custom code and integrations. Here are five key tips to keep in mind to help you get the most out of the platform:
1. Keep your prompts clear, concise and specific
Agentforce works best when your prompts are focused and unambiguous - think of them like API calls. Avoid long-winded instructions and instead use short, structured language that clearly communicates the task. The more direct you are, the better the AI can interpret and act on your intent.
2. Avoid excessive punctuation in your prompts
Too many exclamation marks or question marks (like “Fix this!!!” or “Why????”) can confuse the AI and lead to unpredictable or overly casual responses.
3. Avoid courtesy words like "please" or "could you"
Sometimes Agentforce returns an error when given prompts like “Could you add a logger, please?” whereas a more direct prompt like “Add a logger” works fine.
4. Break down complex logic into multiple prompts
Agentforce handles tasks more accurately when you split complex instructions into smaller, sequential prompts. Instead of asking it to analyse data, generate a report, and email it in one go, guide it step-by-step to improve clarity and reduce errors.
5. Manually configure components that require setup
Agentforce can't automatically generate configurations for components that need manual setup, like HTTP Listeners, HTTP Requests, or Database connections. Make sure to configure these components yourself before asking the AI to build around them, or you may run into missing dependency errors.
Wrap up
Using Agentforce to generate flows in Anypoint Code Builder is a game-changer for building flow structures quickly and easily. Unlike traditional flow-building methods that require you to map out the entire process upfront, Agentforce allows you to iteratively modify and enhance your flows with new prompts, giving you much greater flexibility and control throughout development.
And that concludes this blog post. I’ll be back soon with a new one to showcase some cool features! In the meantime, if you have any questions or need support getting started with Agentforce, don’t hesitate to get in touch. We’re here to help you make the most of this powerful tool and streamline your MuleSoft development process.

.png)
