
Composer Flows may be configured to be triggered by a scheduler, an event in the target system or HTTP invocation. Salesforce Flow actions can make HTTP callouts, so in this blog we will be demonstrating step-by-step how to integrate MuleSoft Composer with Salesforce Flow Builder for dynamic system interactions.
(Before we begin, you must have access to MuleSoft Composer and a Salesforce developer org.)
Let's get started!
Creating invocable composer flow
-
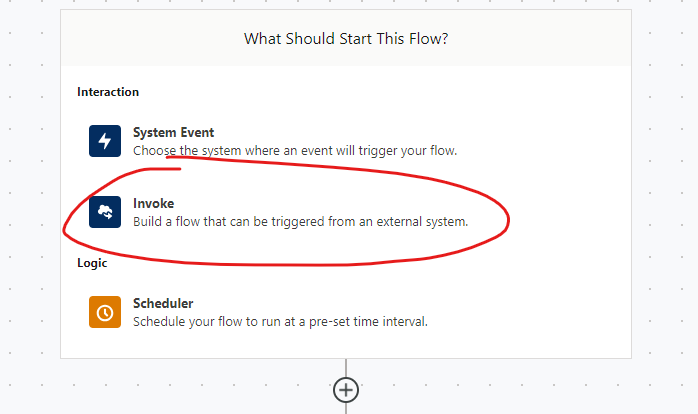
First, create a new flow in composer and set the trigger to Invoke.
-
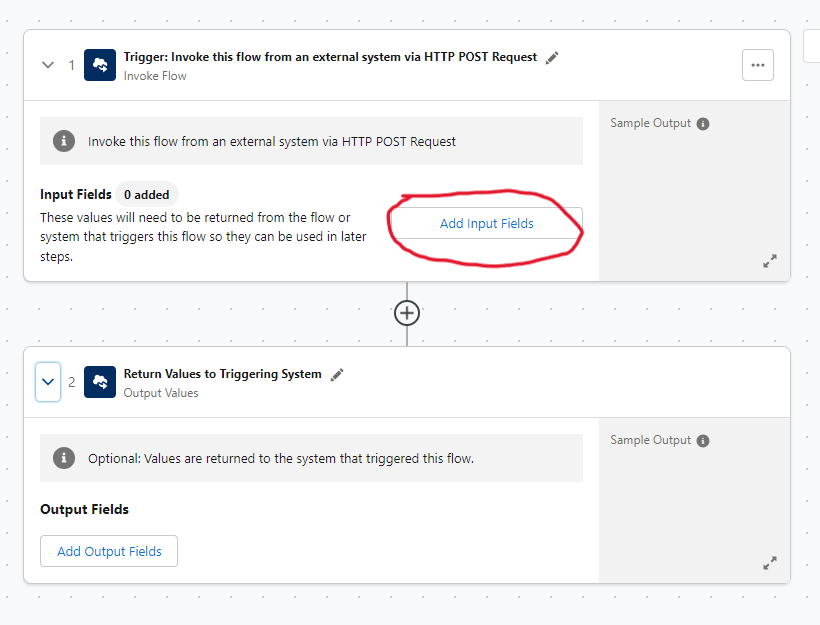
Once you’ve selected the Invoke trigger for the flow, you’ll have the option to set Input Fields and Output Fields. For now we will be focusing on the input fields.
The “Add input parameters” option which will allow you to specify the data, data type for each field, a sample value for testing purposes and a description of what the data represents. These are data pills which will hold the data entering composer from the external service.
In our case this will be data which will enter composer through a Salesforce Flow, and for the purpose of this example, we will be setting the input fields as Product code and Product description in the “Visual editor” tab.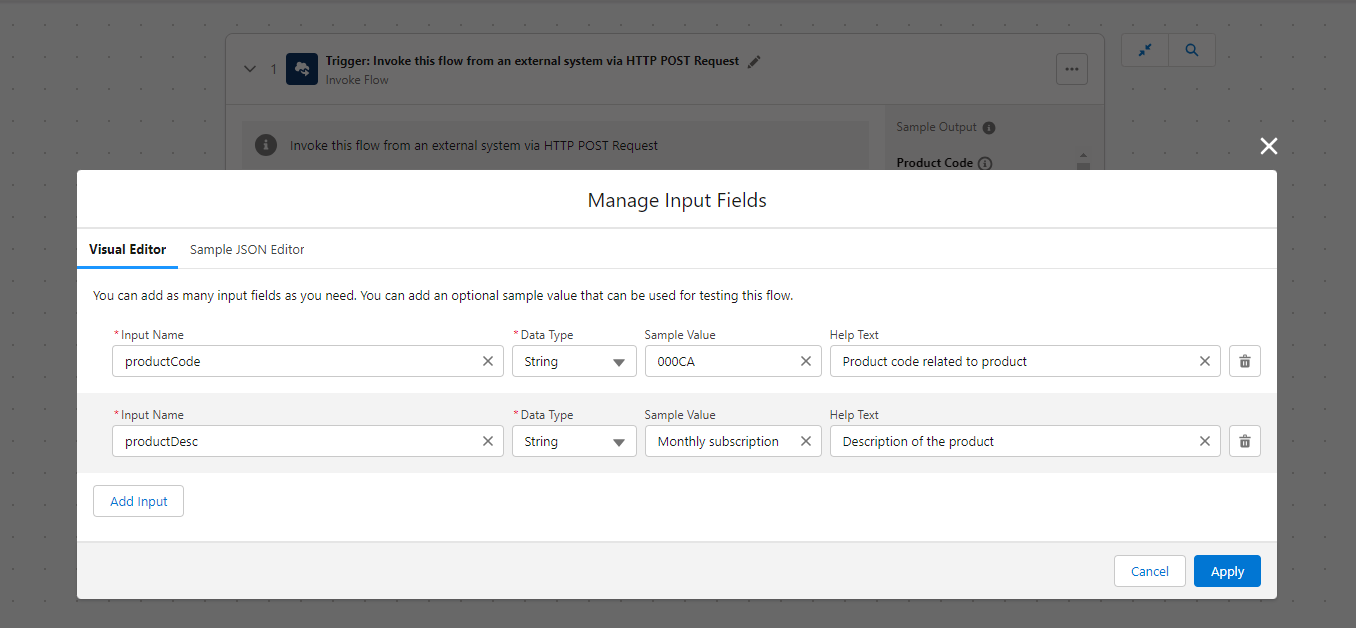
We also have the option to create a custom JSON schema in the tab called “Sample JSON Editor.”
-
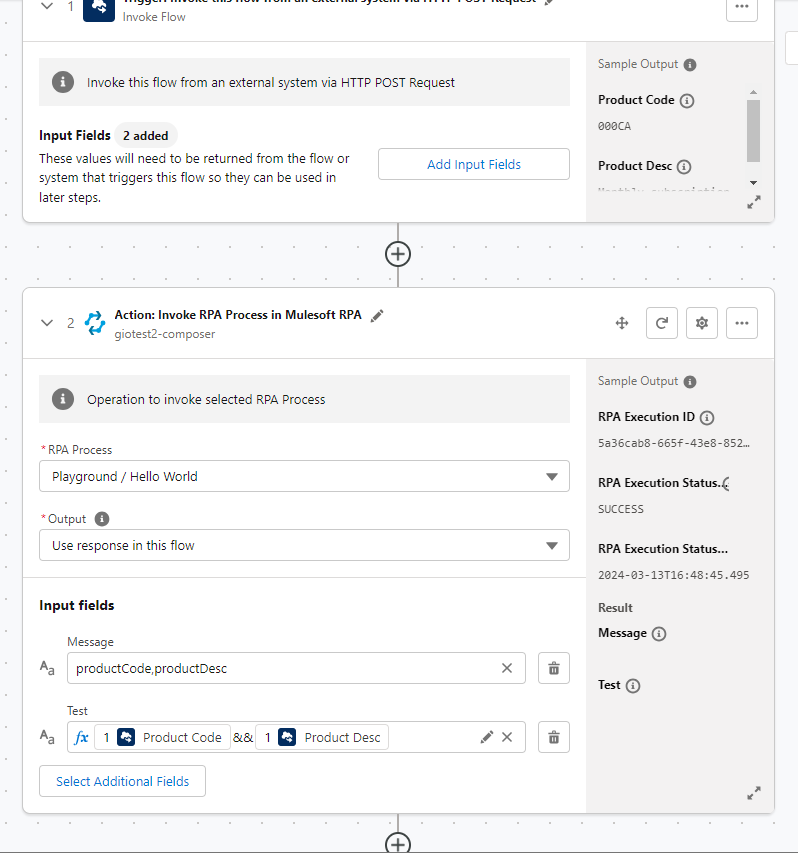
Next, we will build logic for our composer flow utilising the data received from the external system. For demonstration purposes we'll keep it simple and send the received data to an invocable MuleSoft RPA Process, which will use the product code and product description variables in its workflow.
-
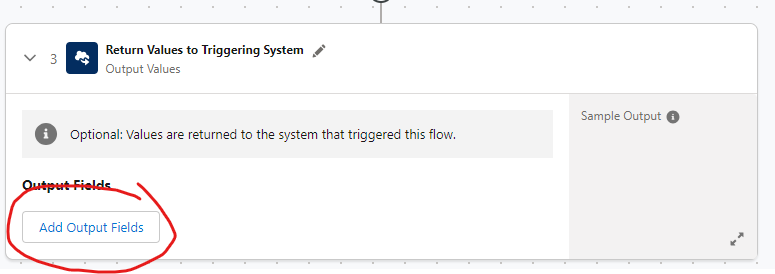
Once you have built all the necessary logic for your composer flow, you have the option to create a response which will be returned to the system that invoked the composer flow. At the bottom of the flow, you will see an action “Return Values to Triggering System” and click Add Output Fields to create the data sent back to the system which called the flow.
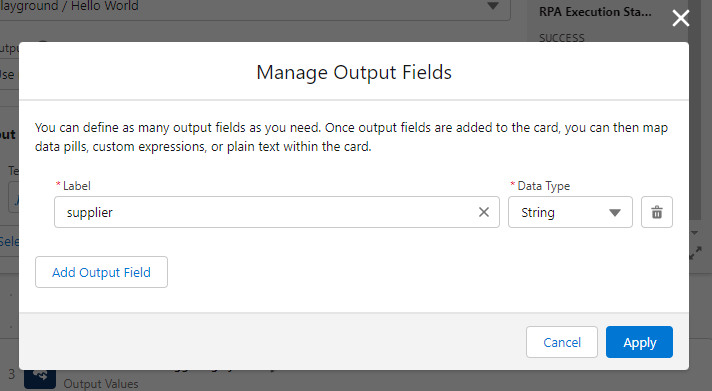
Here, we'll set the name of the output field and its data type.
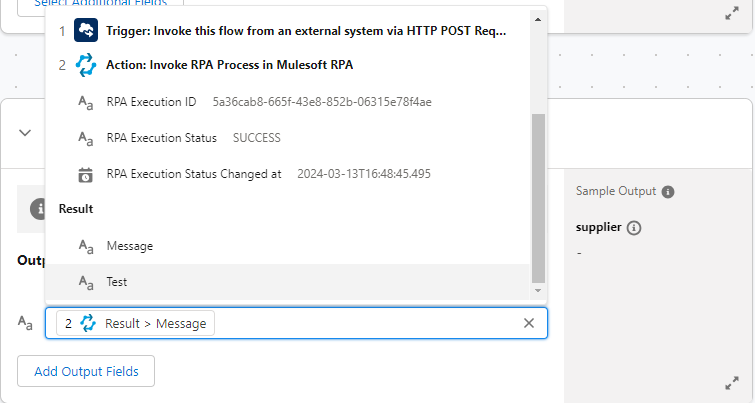
And we will be assigning the value of the “supplier” output field to the result returned from our MuleSoft RPA process.
-
Now that we have concluded the creation of our composer flow and performed appropriate tests according to best practices, we can activate the flow by clicking the “Activate” button on the top right.
Once the flow is activated, when we view the flow, we will find a button on the top right called “Flow Credentials.”
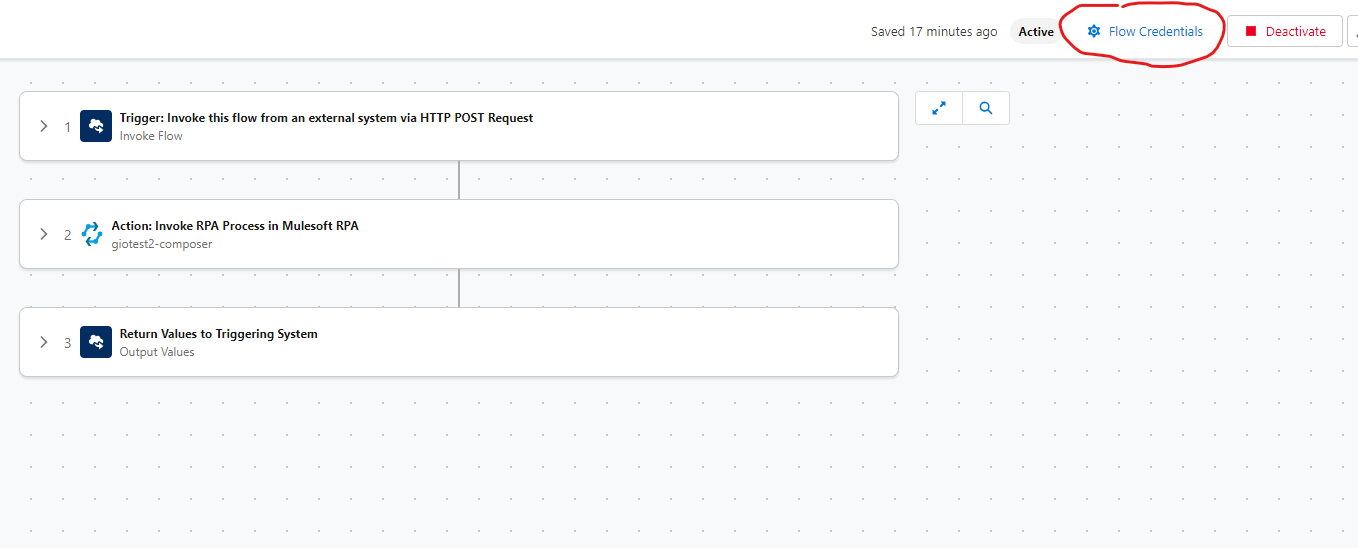
Clicking on it pops up the “Flow Credentials” screen, giving us information on the exposed endpoint related to our composer flow. In this screen, we can see our flow’s URL, the Client ID, Client Secret and API Specification.
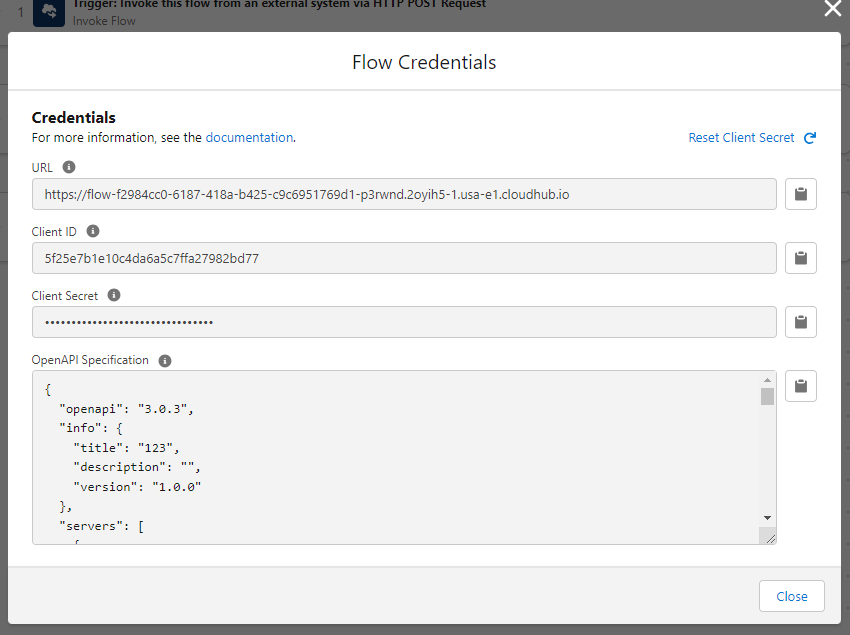
Keep these values handy as we’ll need them in the next part of the setup.
Connecting Salesforce to composer
Now that we’ve created our invocable composer flow, it’s time to set up the Salesforce end of things.
-
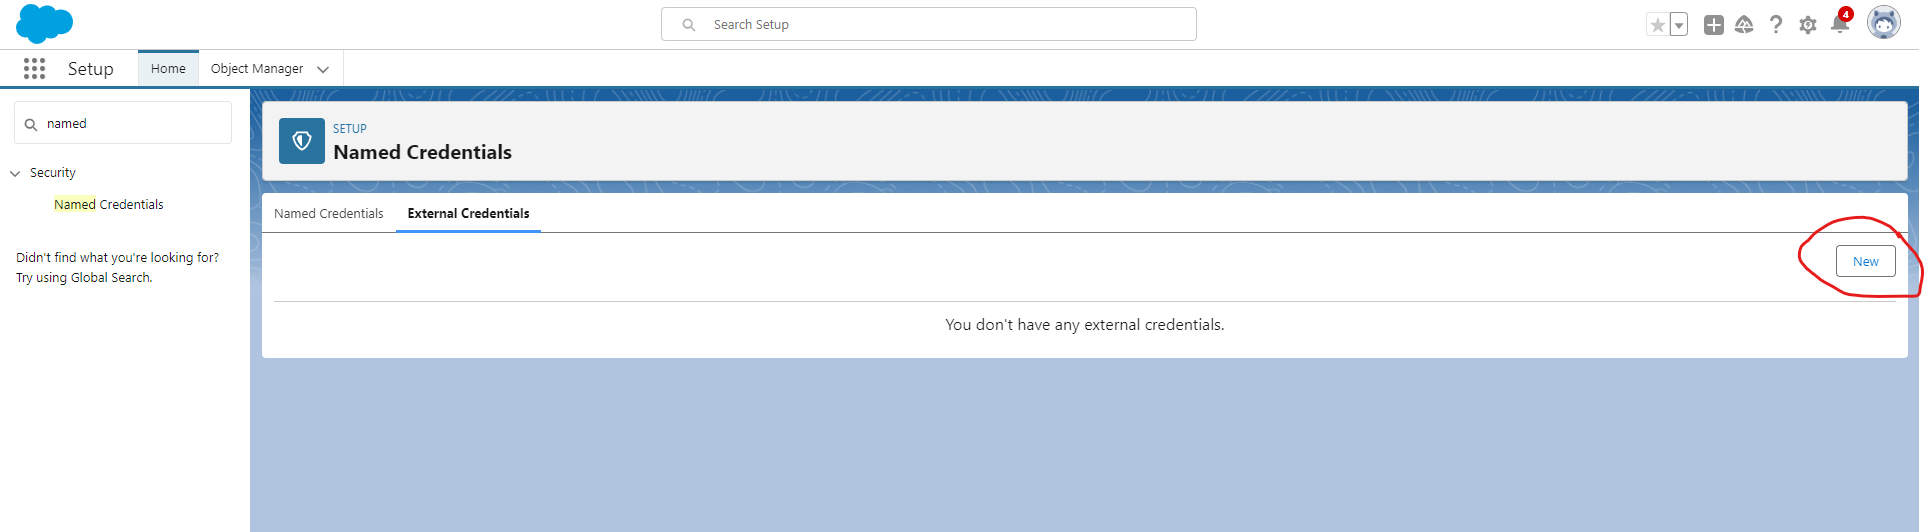
First, we need to set up The External Credential. The external credential holds the authentication details.
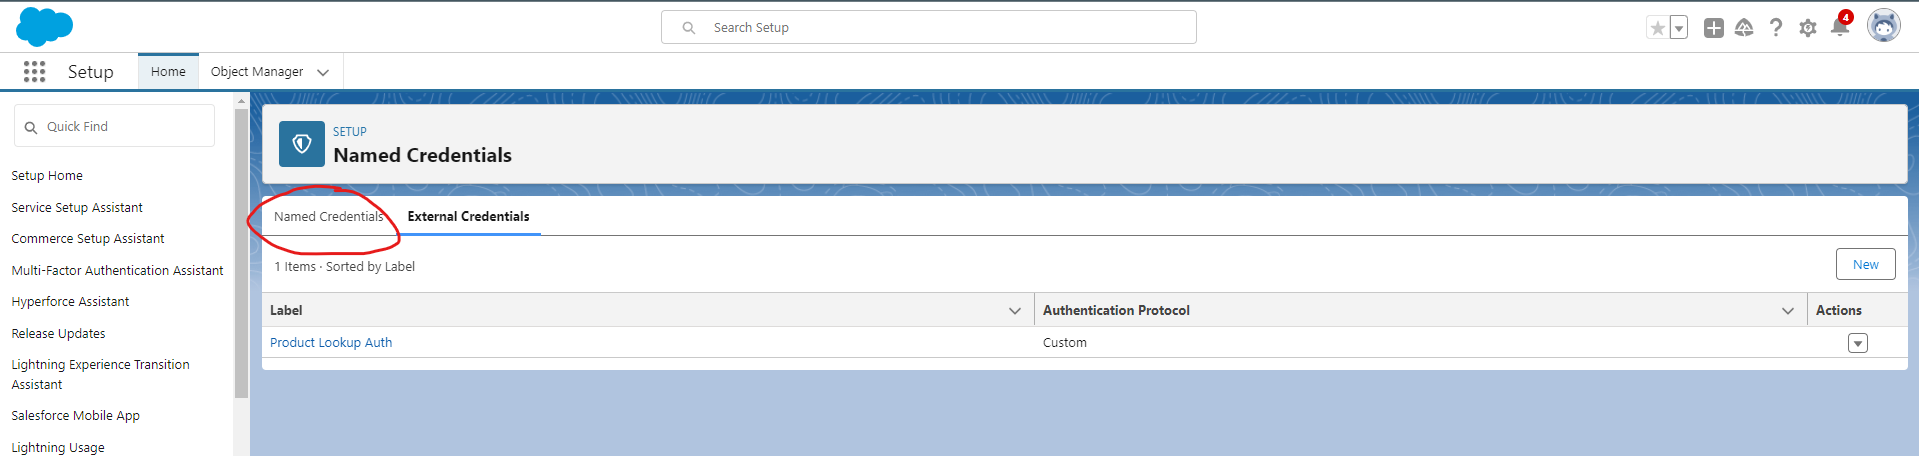
Navigate to Setup → Security → Named Credentials (or just use quickfind) and select the “External Credential” tab and click the “New” button.
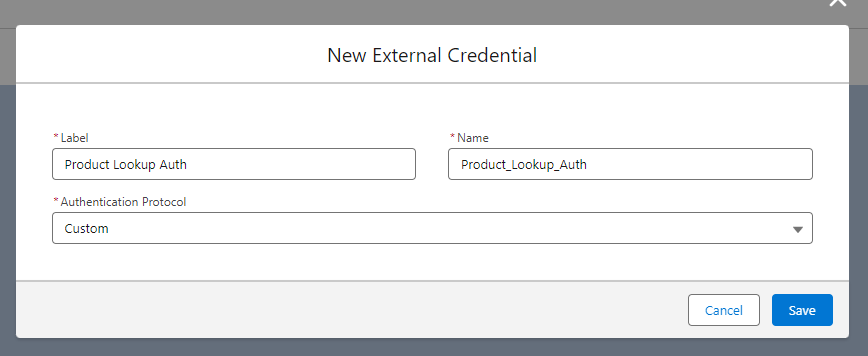
We’ll name ours Product Lookup Auth and select “Custom” for the Authentication Protocol.
-
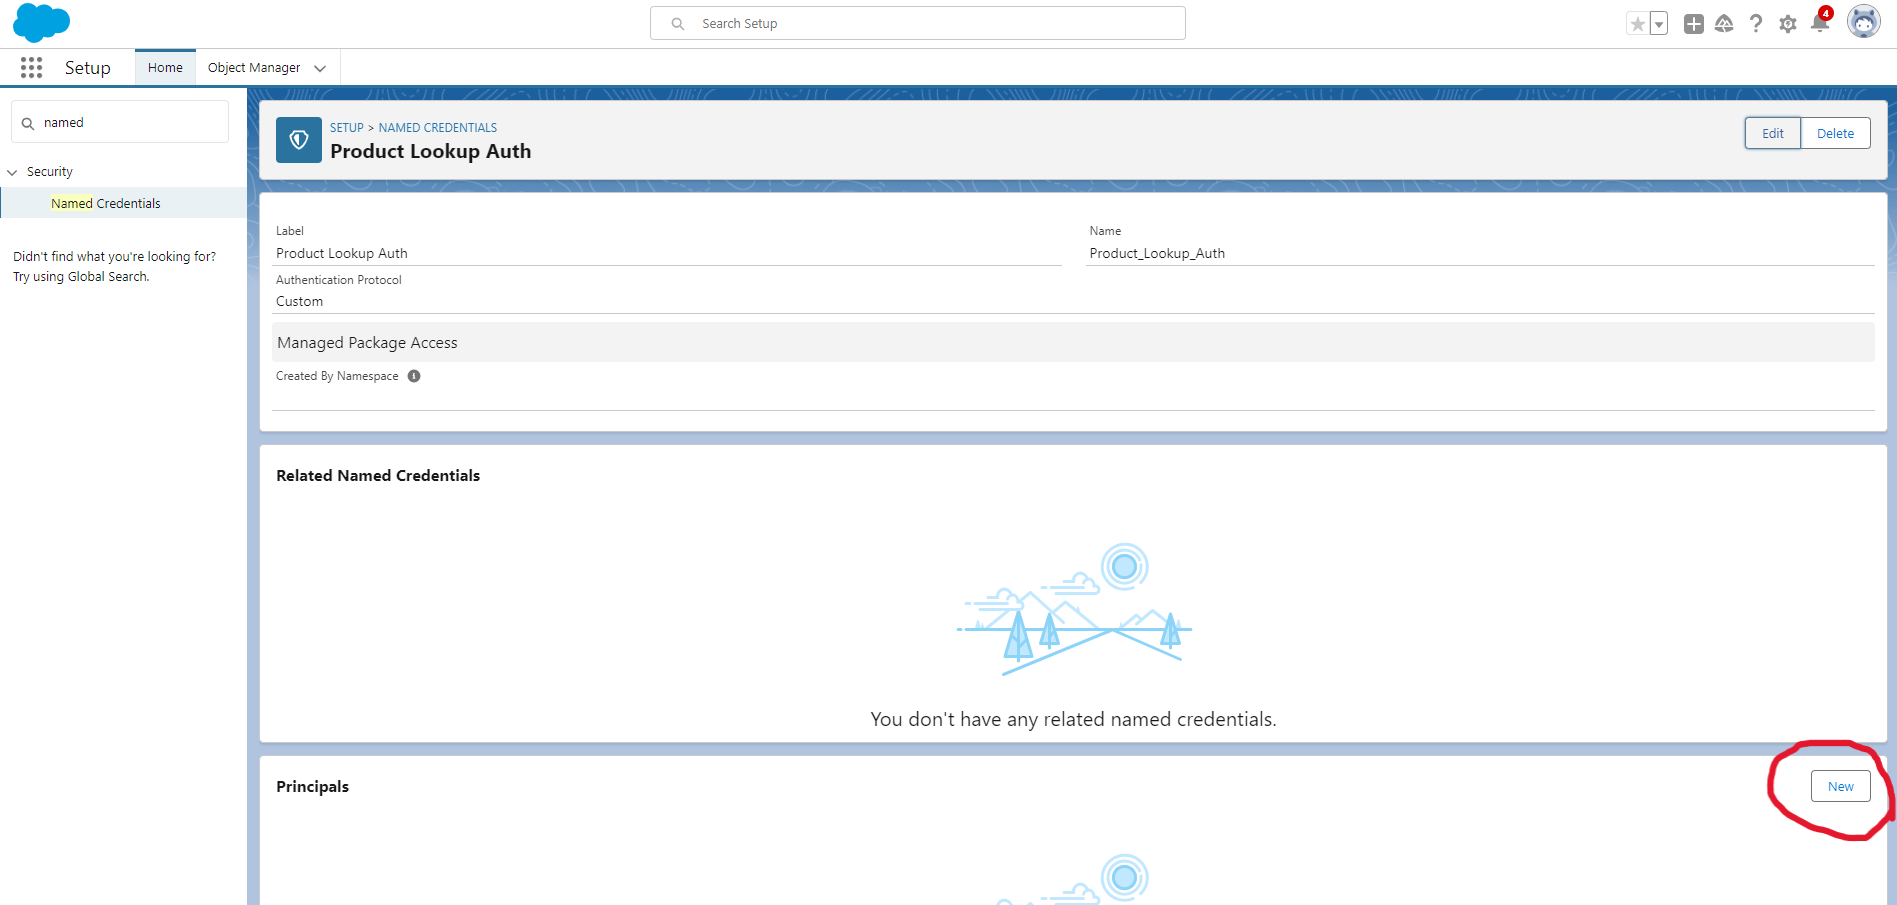
Next, we create a Principal for our external credential. Principals hold the parameters which will be used for the authentication. To create Principals, scroll to find the “Principals” tab and click “New.”
We name our Principal auth and we create two authentication parameters, Username and Password. The value used for these parameters are the values of the Flow Credentials from composer flow we created earlier. Username is the Client ID and Password is the Client Secret.
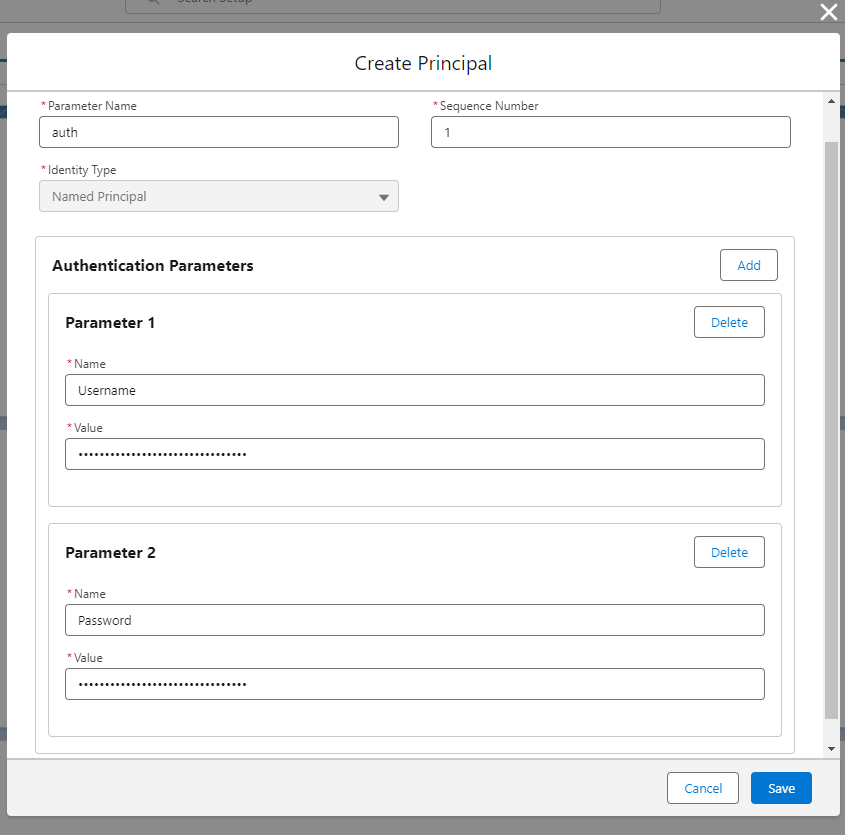
Click Save.
-
The Principals section of the External Credential overview page should now look like the following image.
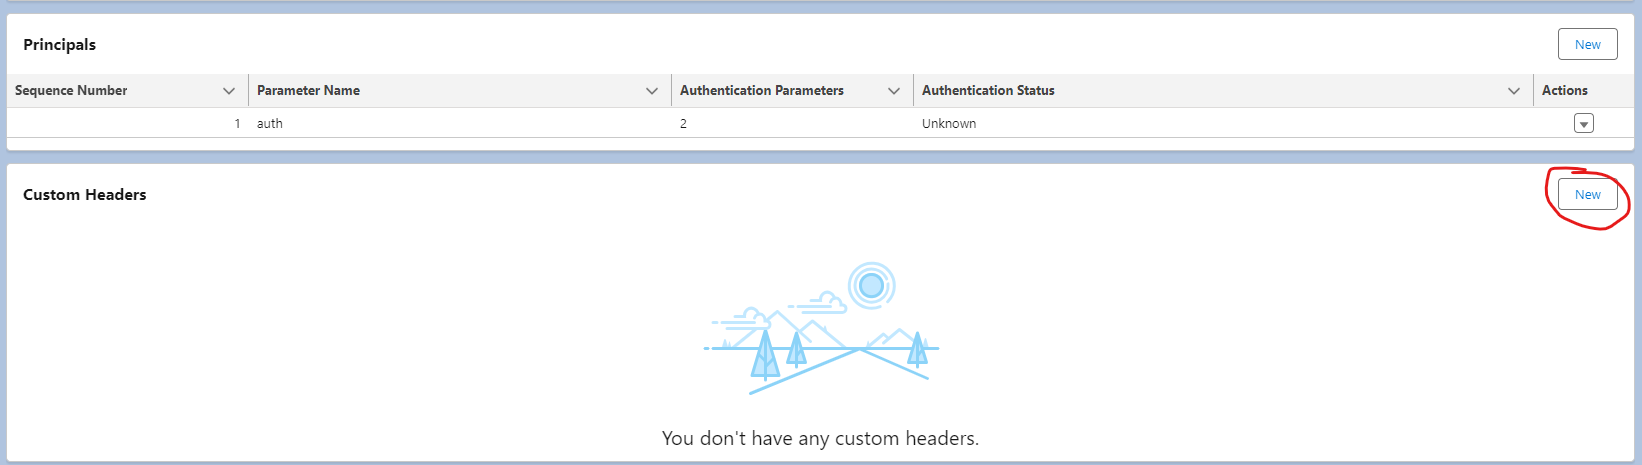
Now, it’s time to create a custom header to pass our authentication credentials. Under the section “Custom Headers”, click New. Set the name as Authorization and set the value as the following formula:
{!'Basic ' & BASE64ENCODE(BLOB($Credential.Greeting_Auth_Flow.Username & ':' & $Credential.Greeting_Auth_Flow.Password))}.This formula will Base64 encode our username and password in order for it to work with our composer flow.
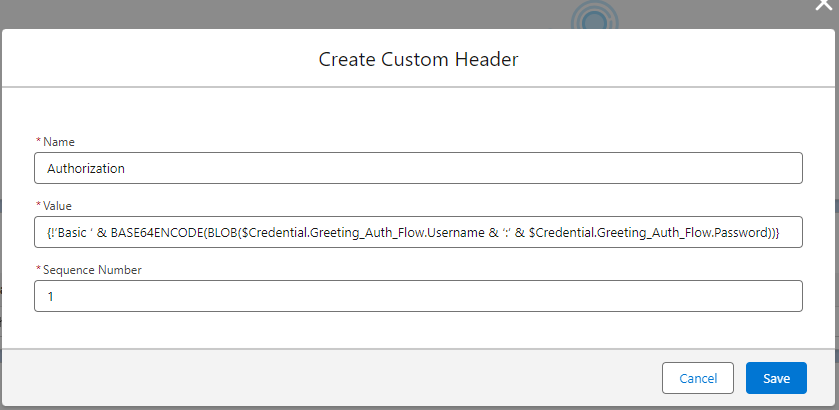
Click Save.
Base64 is a binary to a text encoding scheme takes any form of data and transforms it into a long string of plain text.
-
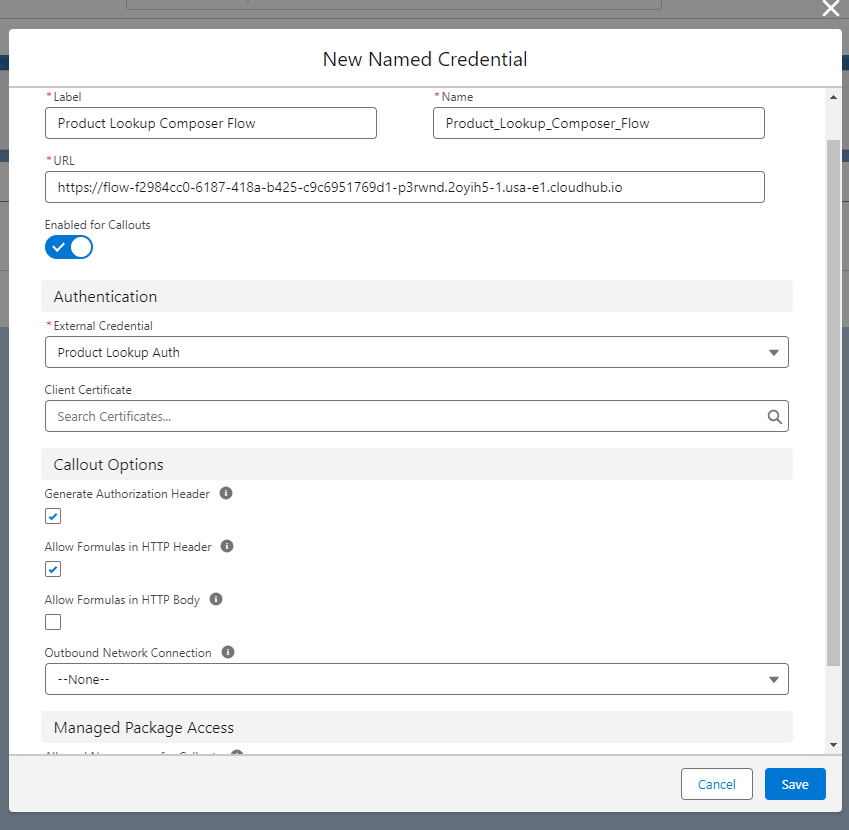
Now that we have created our External Credential for our composer flow, it’s time to create the Named Credential. The Named Credential holds the endpoint. The two are separate, but they work together.
First, navigate to the Named Credentials page.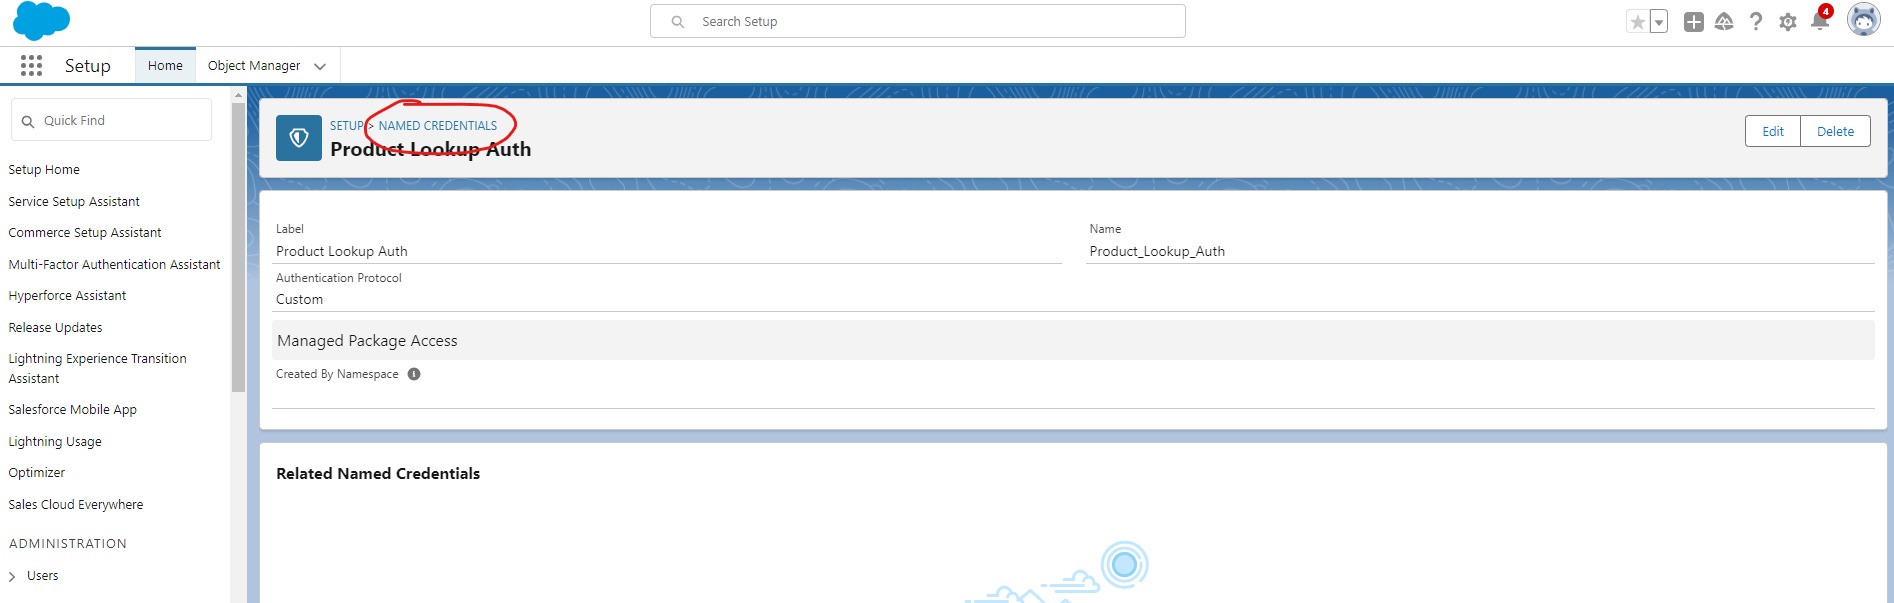
Click Named Credentials.
And create a new Named Credential.
We will call our Named Credential Product Lookup Composer Flow and use the URL from our composer flow’s Flow Credentials. In the Authentication Section, select the External Credential we just created Product Lookup Auth from the dropdown, and make sure to check the Allow Formulas in HTTP Header box. Leave everything else as is and click Save.
-
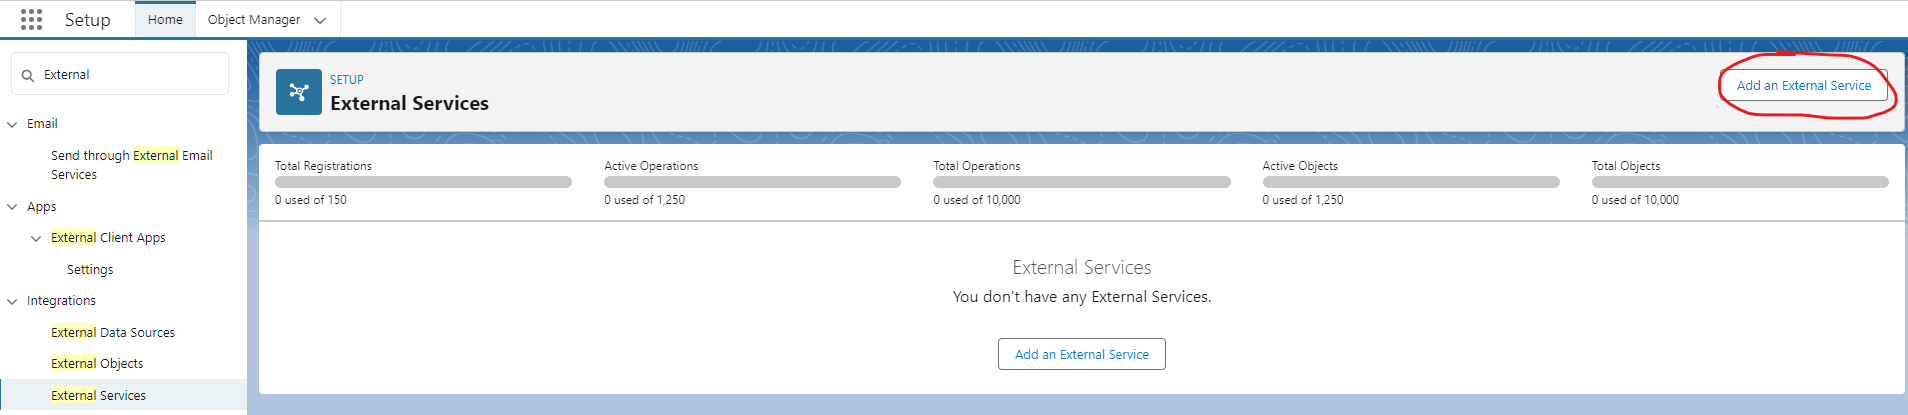
We’ve set up our External Credential and our Named Credential, now wecan create an External Service for our composer flow. To do this navigate to Set up → Integrations → External Services (or use quick find search box) and slick Add an External Service.
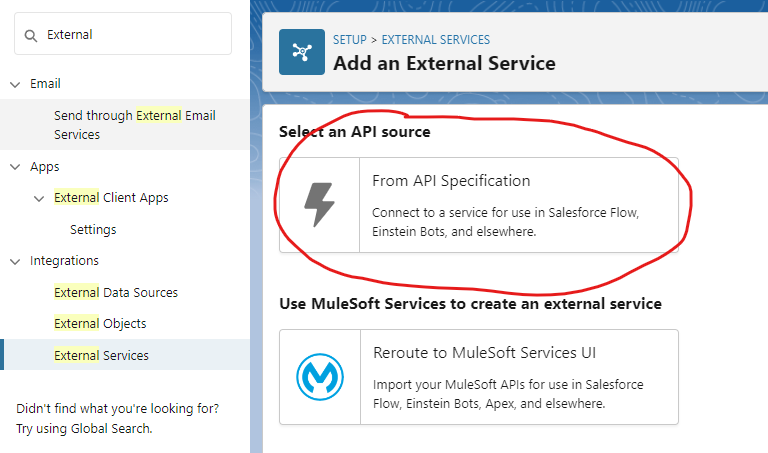
Under Select an API Source click From API Specification. Then click Next.
Give the external service a name, we will be calling it ProductLookupAutomation and give it a description. From the “Service Schema” dropdown, select Complete JSON and then select the Named Credential which we created in the previous step.
When you select the Complete JSON option for the schema, a text box will appear below where we can insert the JSON schema of our API specification found in the Flow Credentials of our Composer flow.
Once you’ve pasted the API specification, click Save & Next.
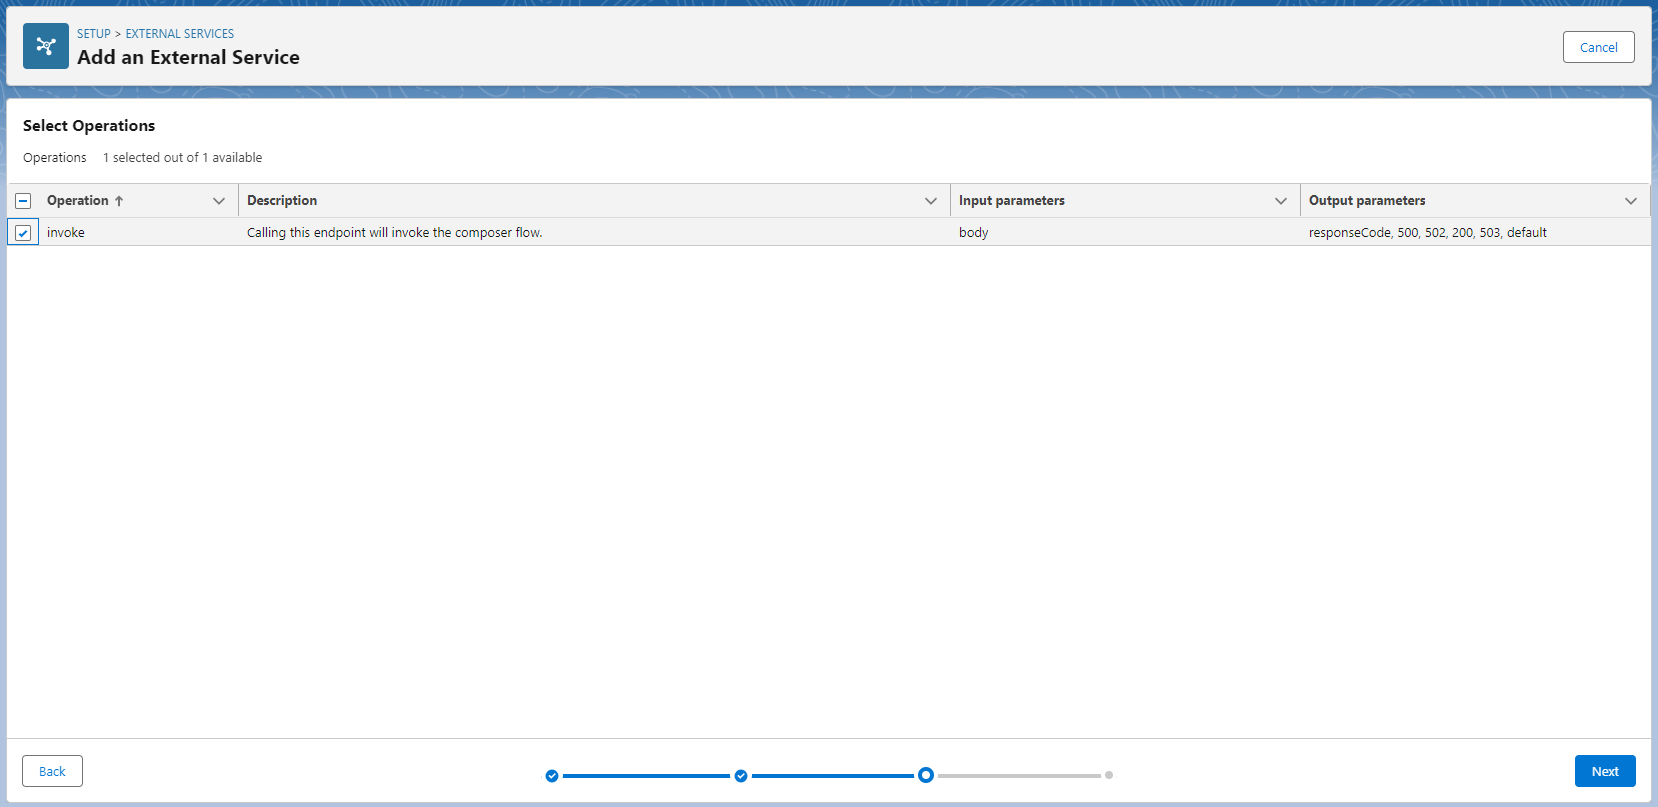
In the “Select Operations” screen, select the invoke operation which calls our Composer flow, then click Next.
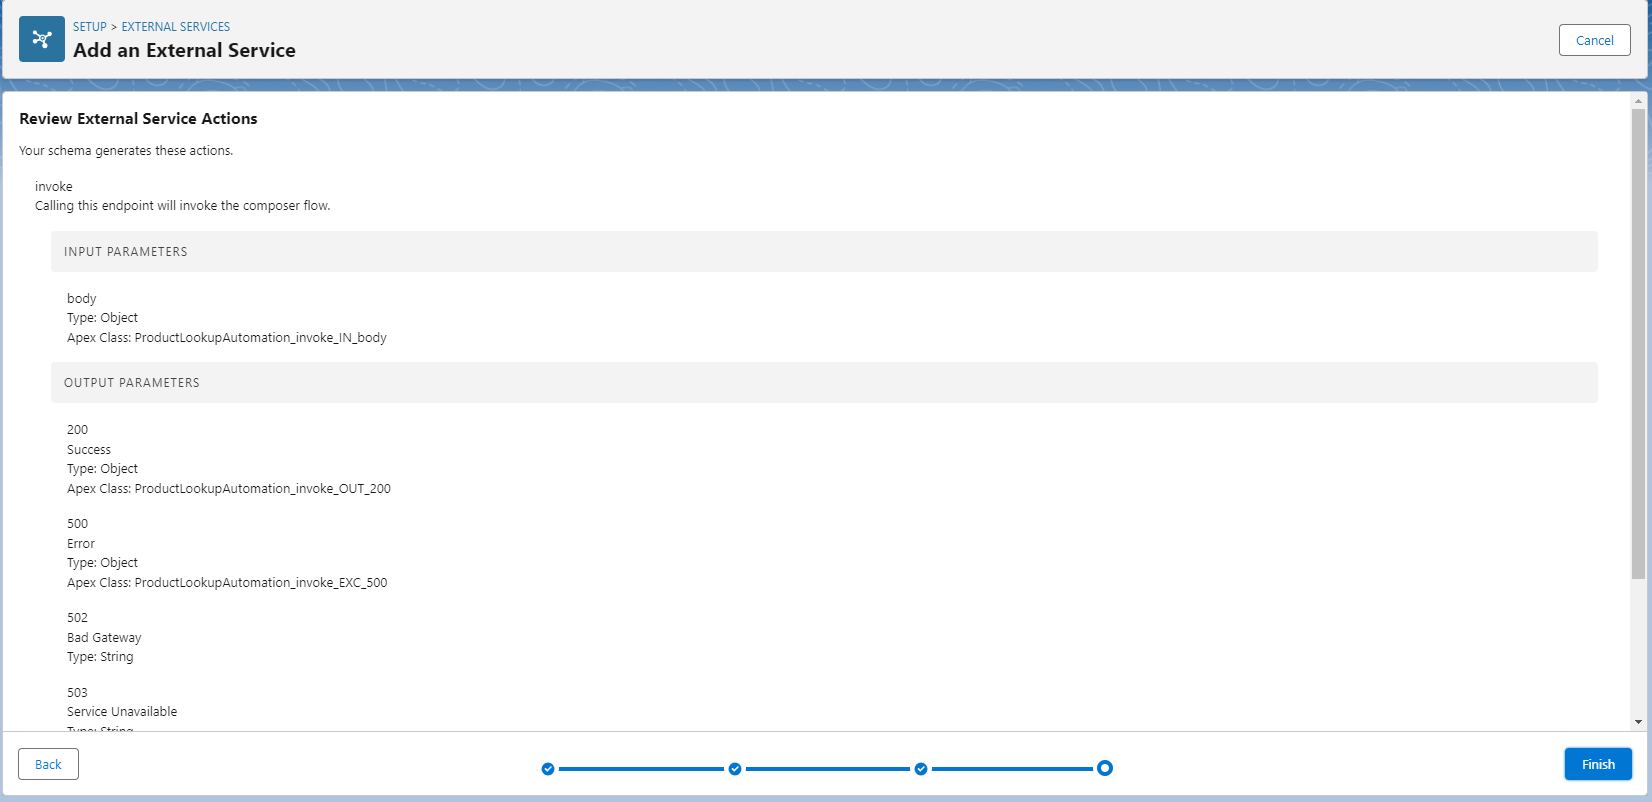
The next screen will outline the details for the External Service we just created, and as you can see from this screen, the Apex class to call Composer from Salesforce Flow builder will automatically be created for you. Once you’ve read this page, click next.
We have now set up all the necessary tools to invoke out composer flow from Salesforce Flows!
Calling composer from Salesforce Flow Builder
Now that we’ve created an External Service for our composer flow, it’s time to create our Salesforce flow which will call composer.
-
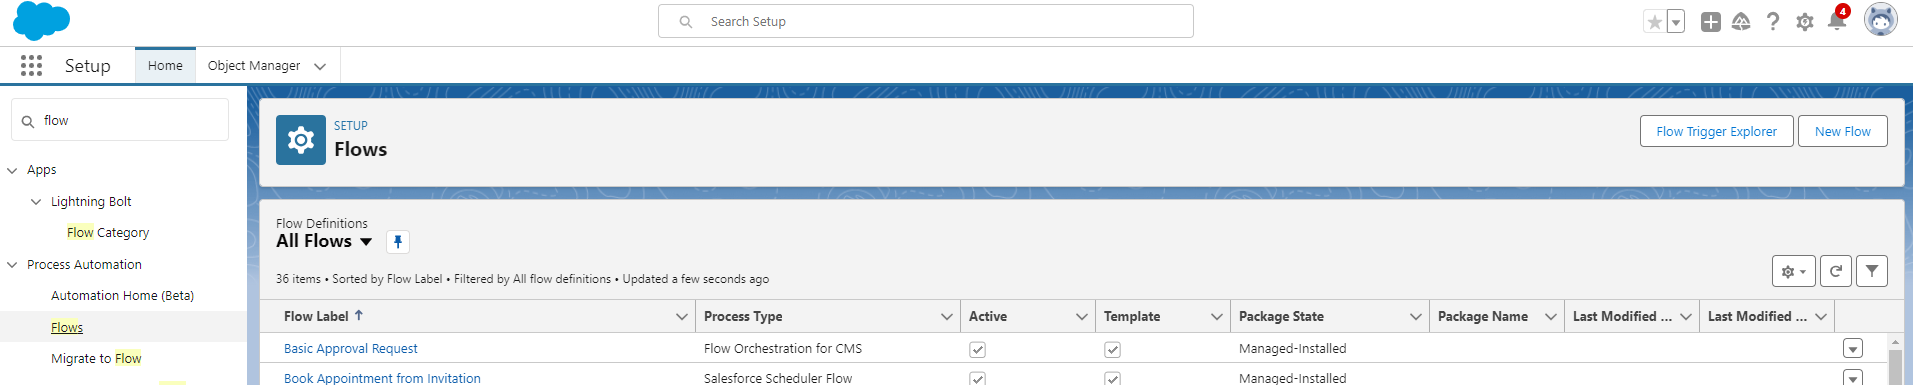
Navigate to Setup → Process Automation → Flows and create a new flow.
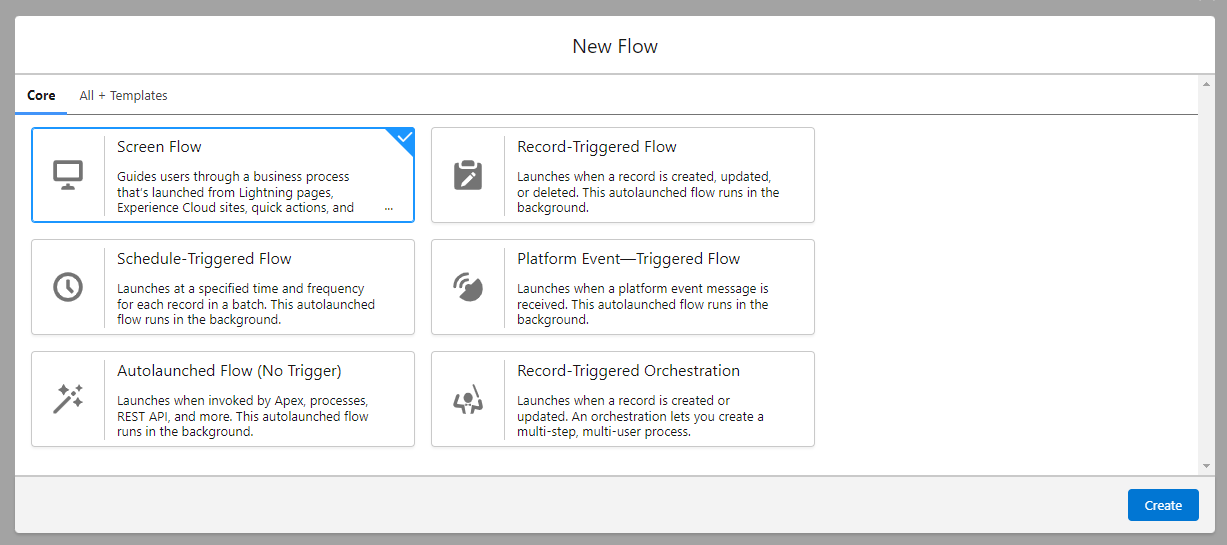
Create a Screen Flow.
-
Once you’re in the Flow Builder, open the Toolbox (the side tab) and create a New Resource.
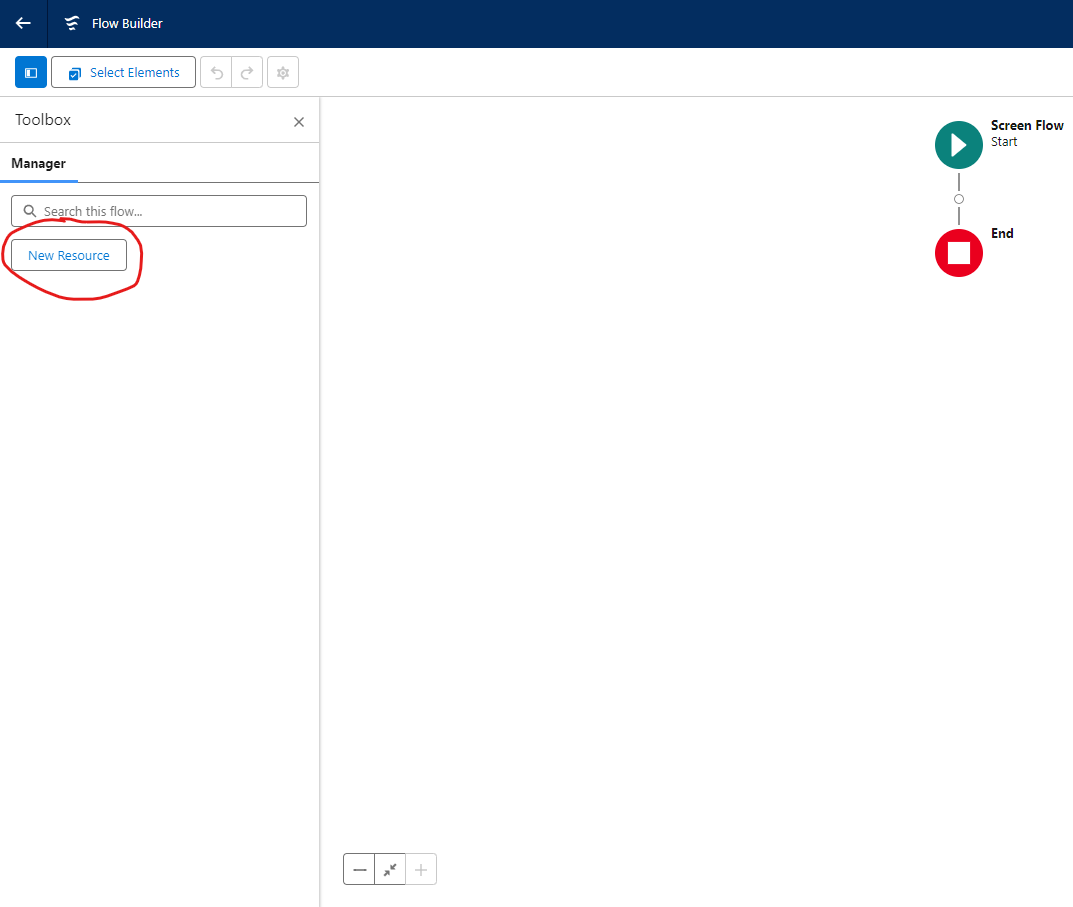
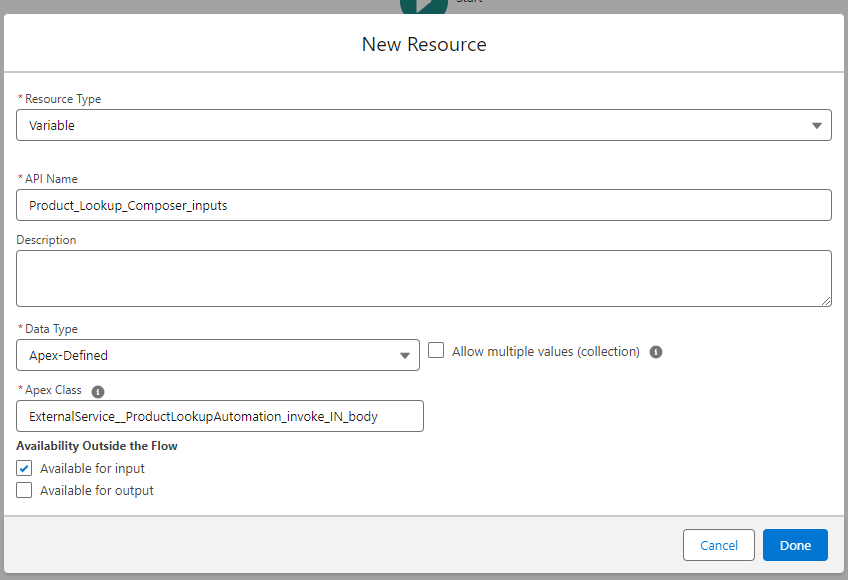
In the window which pops up, select Variable under the Resource Type dropdown, give it an appropriate API name and description. In the Data Type dropdown selection, select Apex-Defined and set the Apex class as the Apex class created for us when we created our External service for composer in the last section. Make sure to select the invoke_IN_body Apex class and check the Available for input checkbox. Once we’ve filled in all of the fields, click done.
-
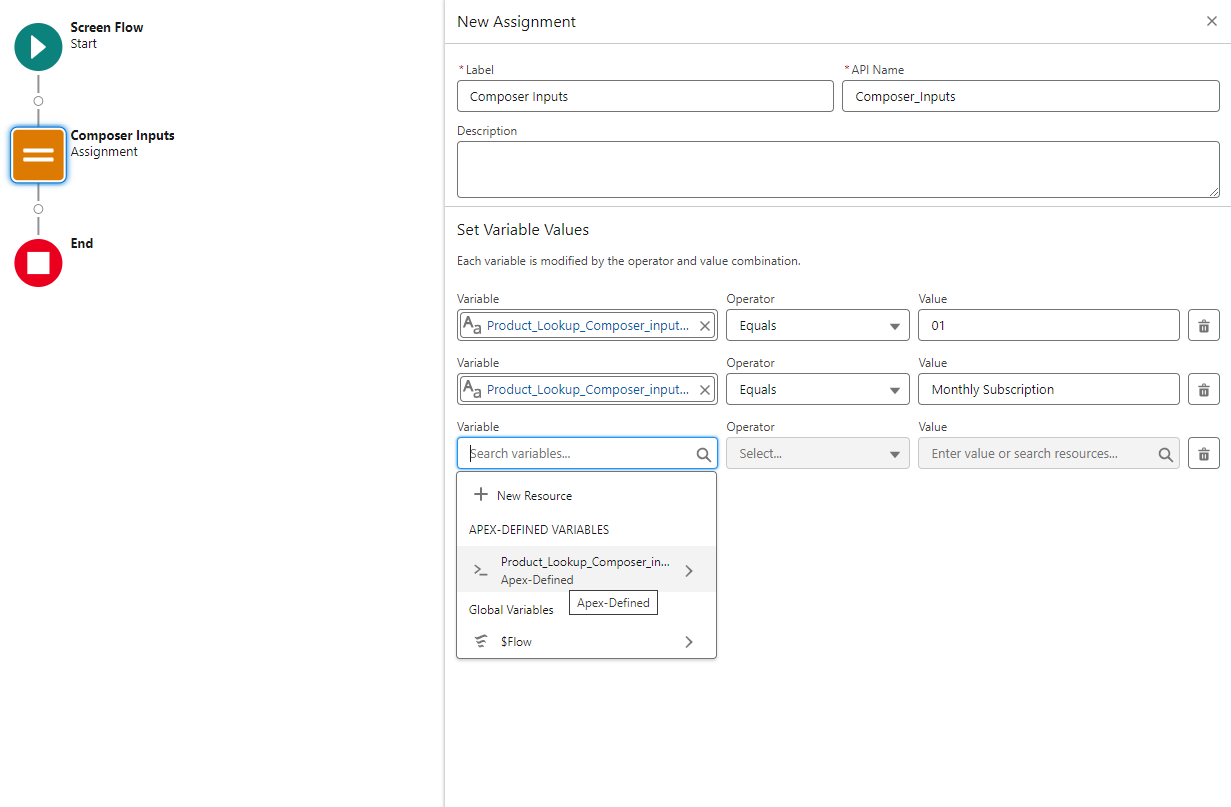
Next, add an assignment element to set the variables which we will be passing to our composer flow. Give the assignment action a label and a description. When selecting variables in the “Set Variable Values”, you will be able to select the Apex-Defined variables which we have defined in our composer flow, in our case these are productCode and productDesc.
-
Once we’re ready, we can add a new Action to make the HTTP call to our composer flow. Add a new element to the flow and select Action, and in the navigation pane scroll until you find the External Service for our composer flow. Click it and then in the search bar you should be able to select the Invoke action.
Now, set a label and description for the action and check the “Body” slider to allow us to set the input variables we assigned in the previous step as the request body to send to composer, leave everything else as is and click Done.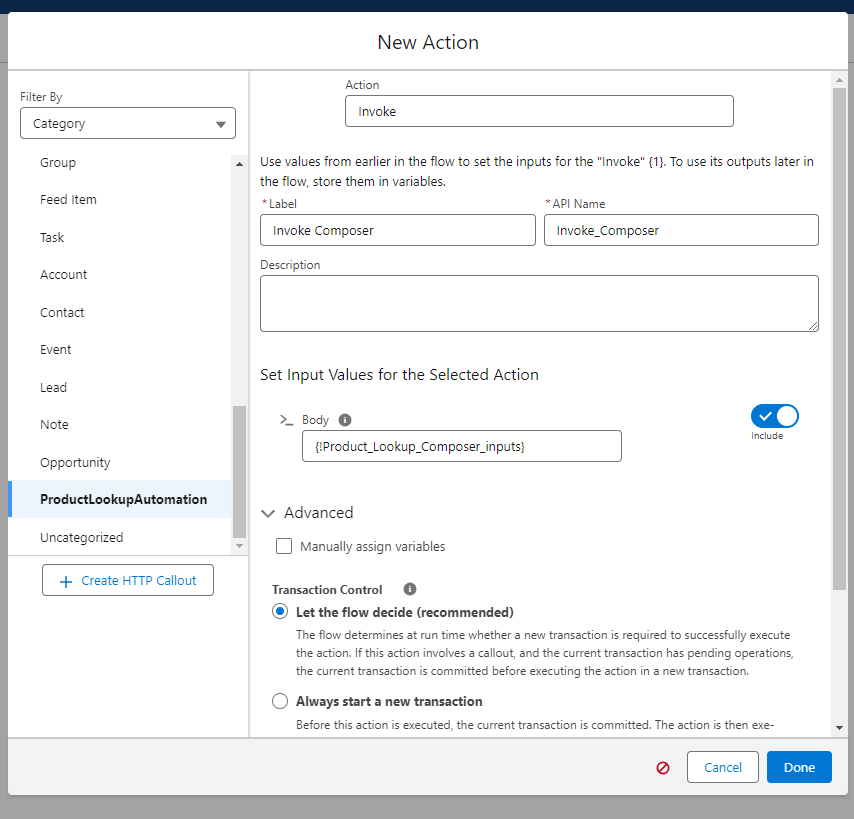
Congratulations! You have successfully invoked a Composer flow from a Salesforce flow. This is a very useful tool to have in your arsenal and can provide you with many options on how to best build a solution, especially to create the integration bridge between Salesforce and RPA!

.png)
