Testing is a critical part of software development, ensuring early detection of bugs or any other problems within your code. However, for most of us it's the less favorite activity; it feels tedious and often repetitive. Furthermore, creating test for a large block of code can be troublesome, especially for beginners.
Here is good news! With the release of the MuleSoft Anypoint Studio 7.5, we now have a new feature – MUnit Test Recorder. The most exciting thing is that it creates unit tests for the Mule Flows without a need for any additional coding! Today, I'll explain in details what the MUnit Test Recorder is and how to use it.
MUnit
Let's start with MUnit. According to the MuleSoft documentation, MUnit is a testing framework for building automation tests. It's similar to JUnit for those with Java background. The test framework is fully integrated with Maven and can be used with the continuous deployment (CD) environment of your choice.
MUnit comes as a part of the MuleSoft Anypoint Studio and allows you to generate MUnit Tests just like you would create and run a standard Mule application. I'm very impressed with one of the most useful MUnit's features - Coverage. By counting the number of processors executed in the event, it measures the proportion of the tested Mule application. Make sure that it's at least 80%!
Test Recorder
Test Recorder is another very useful new feature of the MUnit 2.2.5 that comes with the Anypoint Studio 7.5 release. It records real data as it flows through the application and, based on the captured events, allows quick configuration of the unit tests without a need of writing any code.
While creating your MUnit tests using the Test Recorder, the configuration wizard guides you through the whole process, making it very easy. To use the Test Recorder, click on the name of the flow to test, select the MUnit in the menu option and then select Record test for this flow:
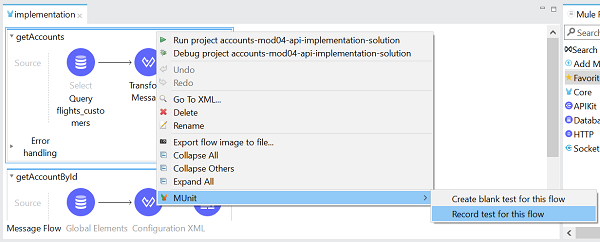
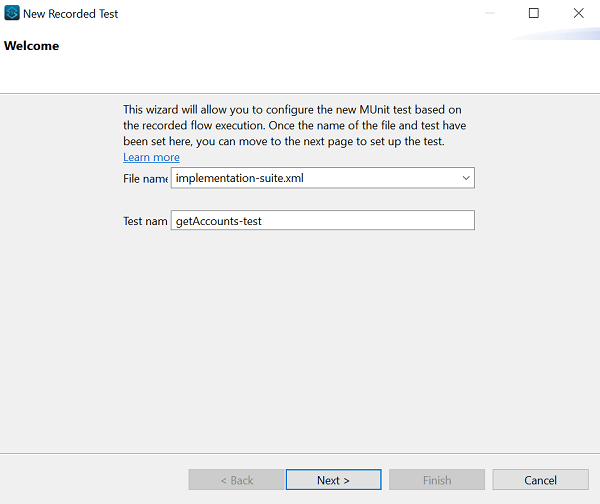
Once the application is deployed and the Test Recorder window becomes visible, make a call to the API and click 'Configure'. On the Welcome page, select the name for the test suite and the actual test to run.
After clicking 'Next' the 'Configure Test' page appears.
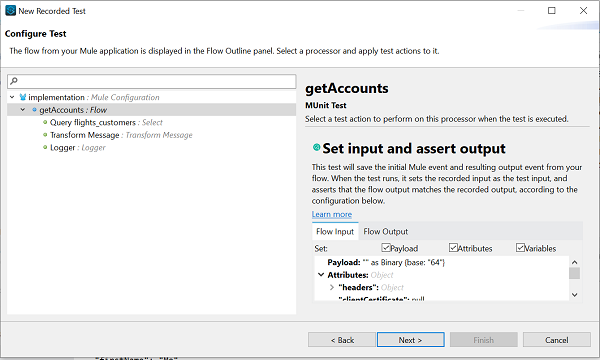
Configure and run your test
You can configure the test by selecting from the following 4 options (see the screenshot below) for each of the processors of the getAccount flow.
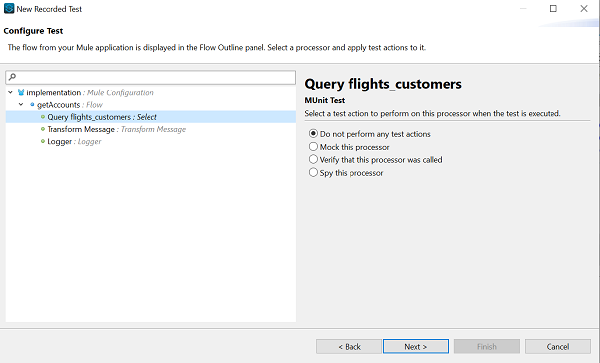
In this example, I choose to Mock the Select component and to Spy the transform message component. For those who are new to MUnit, mocking allows you to imitate a particular part. Spying let you see what happens before and after the processor is executed. The remaining option enables you to verify whether the selected component was called. If the processor is not called, MUnit fails the test. The default selection is 'Do not perform any action'.
Select your actions and press 'Next'. You see the summary of the test together with activities to be performed on each processor.
After that, the new test case appears.
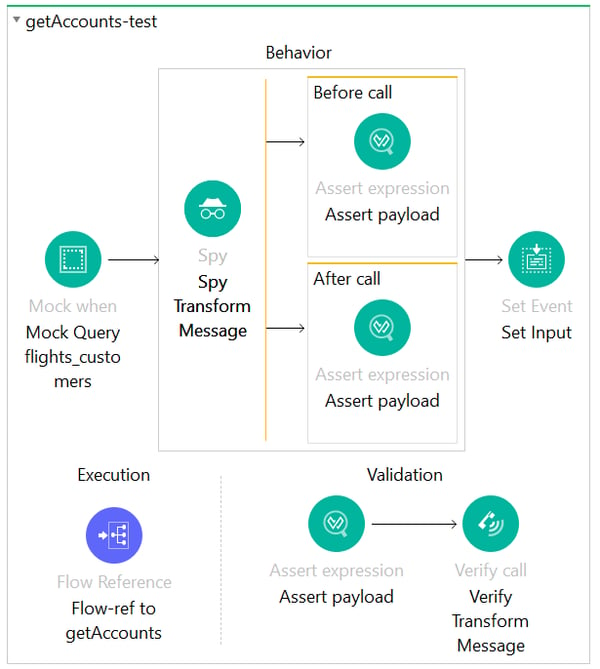
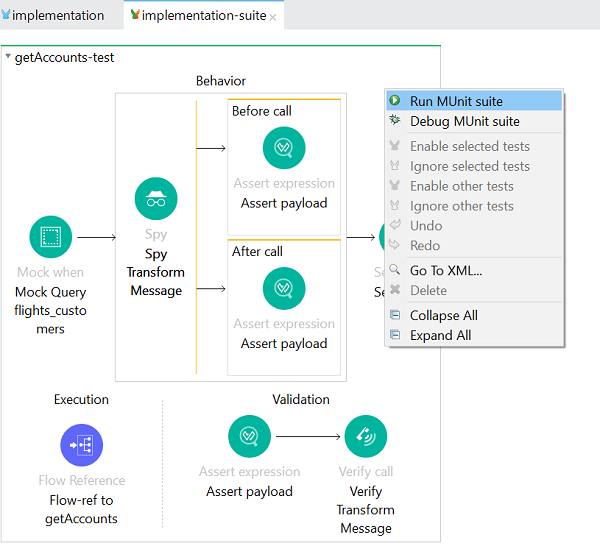
Right-click on the flow and choose 'Run MUnit Suite' to run your test.
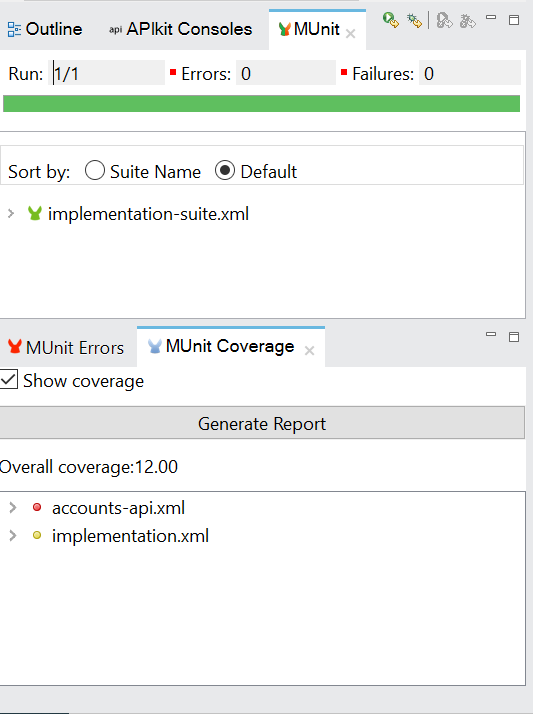
Once the test is complete, check the test coverage, verify if the test is successful and generate a report.
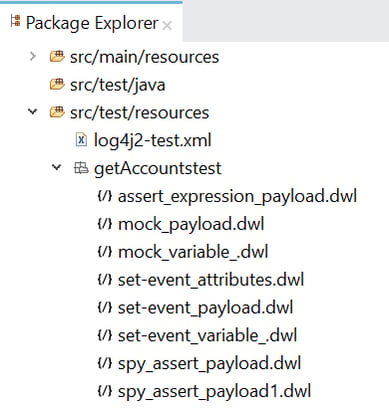
Test Recorder wrote the data as it passed through the flow. In this example, the data is saved in the getAccountsTest (according to the name of the test) folder under src/test/resources:
To test the remaining flows in the same application, follow the same steps as described above. Once being directed to the Welcome page, use the same name of the test suite XML file to keep all tests in one file.
The MUnit Test Recorder is a great feature allowing the unit test development using real data. Although it does not fully automate the creation of unit tests, it is a great starting point for those who are new to MUnit. The Test Recorder can significantly speed up the process of writing MUnits for your flows, and it requires very little knowledge on MUnit.
Crack on with making MUnits for your code right now! And if you have learnt a thing or two from my blog, tweet it, please.


![Tweet: How to create unit tests with #MuleSoft MUnit Test Recorder without coding. [step-by-step guide from Infomentum] https://ctt.ac/c7dQ6+](https://clicktotweet.com/img/tweet-graphic-3.png)

.png)
.png)

