
MuleSoft has exposed an API that provides access to Anypoint MQ administrative functionality. For those who are not familiar with Anypoint MQ, it's a multi-tenant, cloud messaging service that enables customers to perform advanced asynchronous messaging scenarios between their applications. Using this API you can perform a series of actions that otherwise would only be accessible through the Anypoint Platform's web interface. And since many organisations prefer to externalise and automate this type of processes using scripts, I would like to explain how to use all four basic CRUD methods (Create, Read, Update and Delete) using this API.
Prerequisites
Before you proceed to use the Anypoint MQ admin API, make sure you know the ids of your organisation, environment and region.
If you already have this information, skip this section. For the rest, I'll explain how to access them. There are a number of option to choose from.
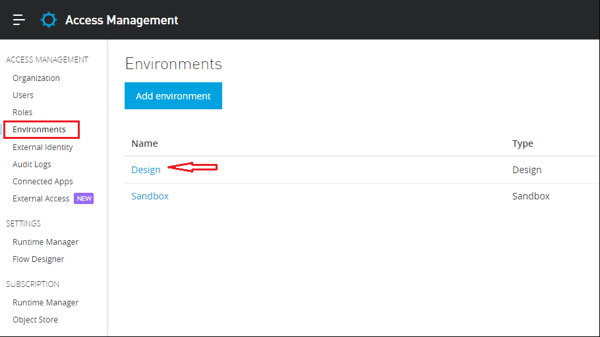
If you have the required permissions for the Anypoint Platform, you can find the Organization id and the Environment id values in Anypoint Platform > Access Management.
Select the Organization section to find the organisation id. All the environment ids can be found under the Environment section. Hover over the environment name to view its URL; the environment id value is the last parameter of the URL.
e.g. https://anypoint.mulesoft.com/accounts/#/cs/core/environments/edit/8f3971c1-298c-416e-b75c-079824837b6b
In case you don't have the required permissions to access the Access Management, there is a workaround how to get the organisation and environment ids. However, you still need at least the Client App id and the Client Secret for the Anypoint MQs.
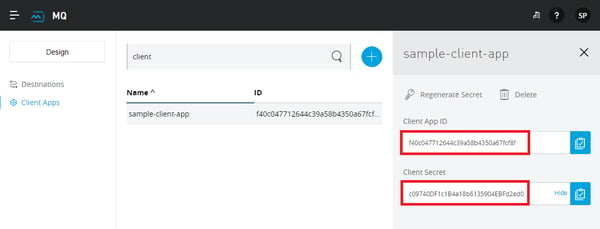
To get the Client App id and the Client Secret values go to MQ > Client Apps and click on the app that you want to use.
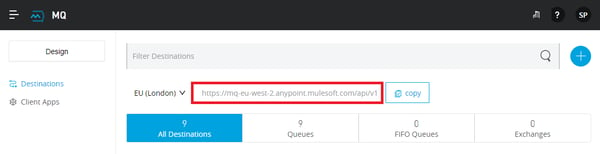
And since you are in the MQ Module, click on the 'Destinations' tab and copy the region id. It is the last parameter required to make calls to our API.
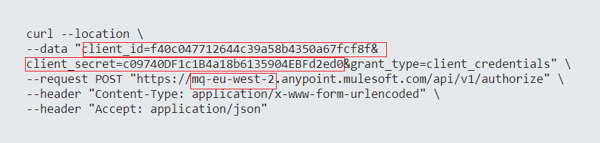
Then, build an HTTP request with the Client App ID and the Client Secret values and execute it using any HTTP client (curl, postman, etc.). Note that the first part of the endpoint should contain the region id, which in our case is “mq-eu-west-2”.
The response should look like this:
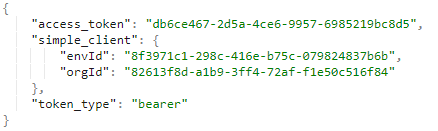 Great! So, now you have the required organisation Id and the environment Id for the environment where your Client App is located. Repeat the same call using the other Client Apps in different environments to gather the environment ids that you need.
Authentication
Now, that you have obtained all required parameters, you need to authenticate your calls. Execute the following POST request to get the access-token; use the username and password of your Anypoint Platform account.
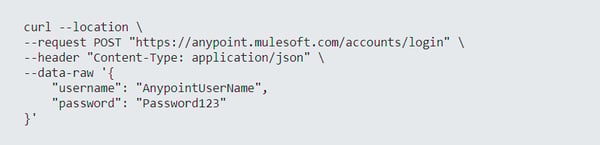
If the request is successful, you should see your access token in the response:

You are now ready to call the Anypoint MQ admin API to create, read, update or delete queues.
Create a queue
To create a new queue named "test-mq" issue the following request.
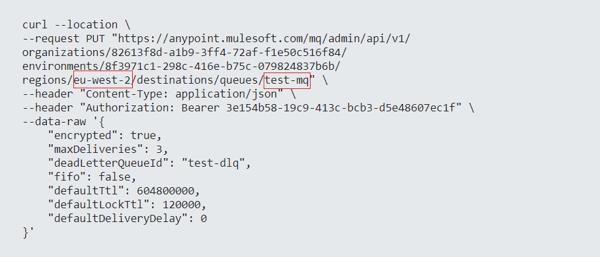
It's important to note that you should drop the region id prefix. In our case we use "eu-west-2" instead of "mq-eu-west-2". Anypoint MQ enables you to ensure that messages that aren't delivered are sent to a queue known as the dead-letter queue (DLQ). If you have a dead letter queue parameter in your request make sure it already exists, otherwise the request will fail.
Note: You can find detailed description for each parameter of the JSON part here.
A successful response to this requests looks like this:
You can also confirm that the new has been created using the Anypoint MQ admin web interface.

Read a queue
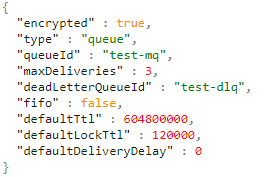
Let us execute a Read call to get the details of the newly created queue.
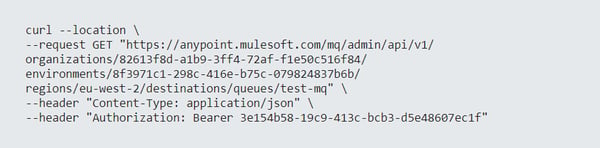
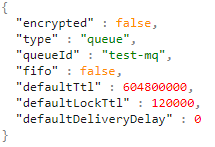
You should receive a similar response:

Update a queue
The new queue has been created successfully, so you are ready to update it. In this example, we want to change the encryption setting from "true" to "false".
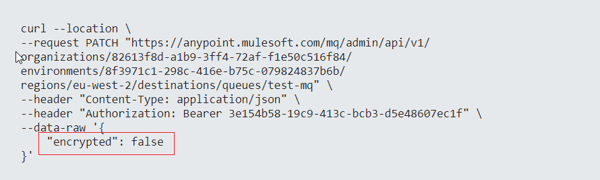
The response is:
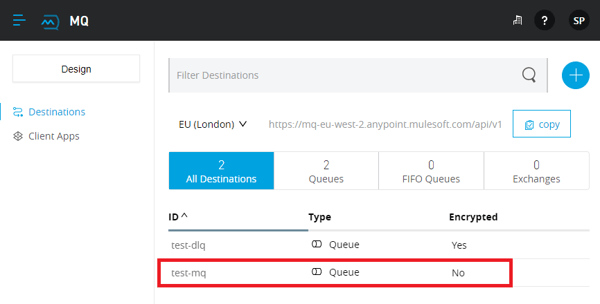
If you check our queue details in the Anypoint MQ admin web interface, you should see the updated setting:
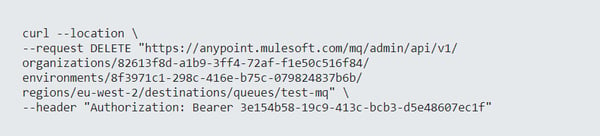
Delete a queue
And finally, execute a call to delete a queue. In our case, we delete our new 'test-mq' queue The result of a successful Delete call is just the HTTP status code 204.
Conclusion
By using the above calls, you can perform four basic administrative actions (Create, Read, Update, Delete)on Anypoint MQs easily and efficiently. A comprehensive documentation of the Anypoint MQ Admin API can be found here.
I hope you found this guide useful. In my next blog I will explain how to automate this process for deployment using Groovy and Gradle tools, so stay tuned!

.png)
