We developers love to use and create automated processes! If something is repetitive, we have an urge to write a bash script, a gulp/grunt task, etc. It is in our nature! If we can automate, we will automate.

Thankfully, we live in an era where creating those automation tasks is getting easier and easier!
One Continuous Integration tool, in particular, I am very fond of is Bitbucket Pipelines. The C/I is a very powerful yet simple tool and the best part, free. It is part of the Bitbucket repo and you can enable it at any time. It basically listens to your branches and runs a series of commands every time you commit your code into that branch.
The Problem
Everything was working great, my Gulp tasks, Webpack bundler, but how to deploy all my assets from bitbucket to WP Engine? The way our team was doing it beforehand wasn't ideal: the developer had to run the build command manually, then commit the dist folder and push the WP Engine. Not the smoothest process, right?
The issue I had was - how to run the build command automatically and deploy to WP Engine, if I don't want to commit the dist folder?
My Solution
The conditionals are:
The bitbucket repository should contain only the source and the gulp files
The WP Engine repo should contain only the dist files, which means, no SCSS, webpack.config.js or Gulpfile.js.
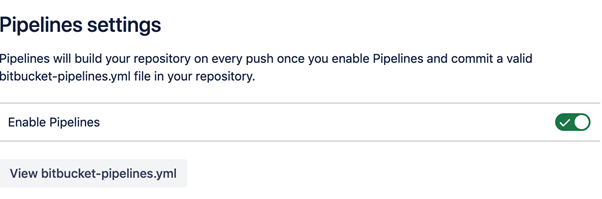
The first step is to enable Bitbucket Pipelines:
Now, go to the SSH keys tab and click on generate keys, also add "git.wpengine.com" to known hosts.
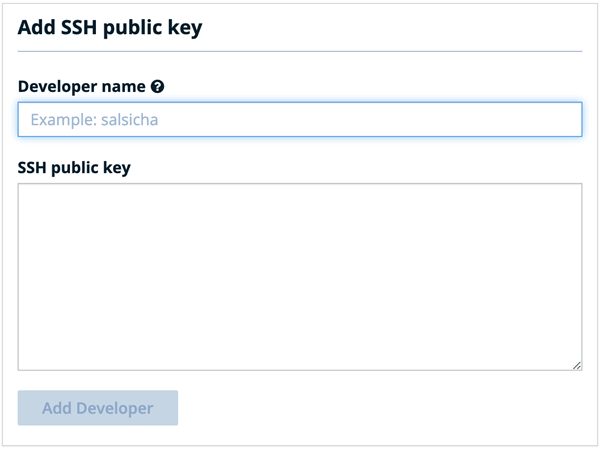
Copy the public key and go to the WP Engine dashboard. Select your project and go to the "Git push" tab. Add a name and paste the key you created in Bitbucket.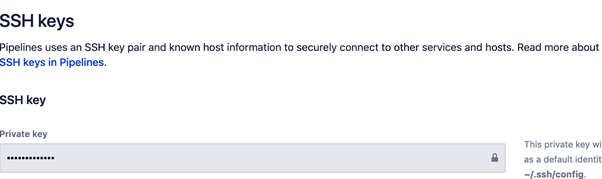
Your bitbucket is now authorized to communicate with WP Engine. The next step is to create the bitbucket-pipelines.yml file. YAML files are like JSON files but use indentation instead of brackets.
First, let's use the image "node:10.24.1".
In our first step, I install all the dependencies and gulp-cli.dep: &depstep:name: Installing dependenciescaches:- nodescript:- npm cache clean -f- npm install -g n- npm install -g gulp-cli- yarn
Now, it's time to run the build command. Also don’t forget to compress the wp-content folder and export as an artifact, since we are going to use it in our next step.build: &buildstep:name: Build assetscaches:- nodescript:- apt-get update -y- apt-get install -y ssh- apt-get install -y zip- npm rebuild node-sass- npm run build- zip -r temp.zip wp-contentartifacts:- temp.zip
Now we move on to deployment, which was the tricky part for me. First, delete the ".git" folder, so we don't have any repo conflict. Then, clone the wp-engine repo inside a new folder, in this case, I named it deploy. The following step is to move the compiled file "temp.zip" to the deploy folder and unzip it. It will overwrite all the old files. Now we just have to commit those modifications and push to origin, both production and staging and voilá! You now have integrated bitbucket pipelines with WP Engine. Every time you merge your code into master, it will create a build and deploy to WP Engine automatically!deploy: &deploystep:name: Deploy to PRODscript:- export REPO="your_repo.git"- export USER_EMAIL="$USER_EMAIL"- export USER_NAME="$USER_NAME"- echo deploying to $REPO- rm -rf .git- git config --global user.email "$USER_EMAIL"- git config --global user.name "$USER_NAME"- git clone git@git.wpengine.com:production/$REPO deploy- mv temp.zip deploy/ && cd deploy- ls | grep -v temp.zip | xargs rm -rf- unzip temp.zip- git status- git add . && git commit -m "$BITBUCKET_COMMIT"- git push origin master- git push -f git@git.wpengine.com:staging/$REPO master
I like to split the steps into variables like that, so it looks cleaner and you can reuse the steps if you want.pipelines:branches:'master':- <<: *dep- <<: *build- <<: *deploy
TL;DR;
If you want a short explanation, I have split it into small steps.
Enable pipelines in your bitbucket repository;
Generate an SSH key and add git.wpengine.com to known hosts;
Go to your WP Engine dashboard. Under the Git Push tab paste your public key;
Create a bitbucket-pipelines.yml with the following content
image:
name: node:10.24.1
dep: &dep
step:
name: Installing dependencies
caches:
- node
script:
- npm cache clean -f
- npm install -g n
- npm install -g gulp-cli
- yarn
build: &build
step:
name: Build assets
caches:
- node
script:
- apt-get update -y
- apt-get install -y ssh
- apt-get install -y zip
- npm rebuild node-sass
- npm run build
- zip -r temp.zip wp-content
artifacts:
- temp.zip
deploy: &deploy
step:
name: Deploy to WP Engine
script:
- export REPO="your_repo.git"
- export USER_EMAIL="$USER_EMAIL"
- export USER_NAME="$USER_NAME"
- echo deploying to $REPO
- rm -rf .git
- git config --global user.email "$USER_EMAIL"
- git config --global user.name "$USER_NAME"
- git clone git@git.wpengine.com:production/$REPO deploy
- mv temp.zip deploy/ && cd deploy
- ls | grep -v temp.zip | xargs rm -rf
- unzip temp.zip
- git status
- git add . && git commit -m "$BITBUCKET_COMMIT"
- git push origin master
- git push -f git@git.wpengine.com:staging/$REPO master
pipelines:
branches:
'master':
- <<: *dep
- <<: *build
- <<: *deploy
*Bear in mind I'm using gulp. If you are using another bundler tool, just remove the gulp-cli.
Hope you found this blog useful. If you have any questions, just drop us a message in comments!